Creating content

Learn how to deliver amazing content to your visitors

Setting up your knowledge base

  • Organizing knowledge base content

    You can organize your knowledge base content into categories and sections and manage the order of those categories and sections.

    You must be a Guide Manager to add and edit sections and categories.

    Adding a category to your knowledge base

    Categories are the top-level organizing containers of the Help Center and at least one must exist. Categories contain sections. If you have only one category in your Help Center, then the category itself is hidden to end-users, and they see only the sections in your Help Center.

    For more information, see About the Help Center knowledge base structure.

    To add a category

    1. In Help Center or Guide Admin, click Add in the top menu bar, then select Category.

      Add a new category

    2. Enter a Name and optional Description for your category.
    3. (Guide Enterprise) In the sidebar, if you have multiple category templates in your live theme, click the Template menu, then select a template.

      If you do not select an alternate template, the default category template will be applied.

      Select a template

    4. In the sidebar, ensure the correct Source language is selected.
    5. Click Add.

    The category is created. Remember, if you have only one category, then the category itself is hidden to end-users, and they see only the sections that are in your Help Center.

    For information about how you can display a section in multiple categories, see Displaying an article or section in multiple sections or categories in our Support tech notes.

    Adding a section to your knowledge base

    Sections are collections of related articles. To add a section, you must have at least one category to act as its parent container.

    • On Guide Lite and Professional, each section must be child of a category.
    • On Guide Enterprise, a section can be a child of a category or a section.

    Permissions for viewing and managing articles in a section are set at the article level, not the section level.

    If visibility for all the articles in a section is internal (Professional and Enterprise only), then the section will not be visible to end-users, but if one article in an internal section is visible to any end-users, then the section will become visible as well.

    To add a section

    1. In Help Center or Guide Admin, click Add in the top menu bar, then select Section.

      Add a new section

    2. Enter a Name and optional Description for your section.
    3. (Guide Professional and Enterprise) Ensure the correct Source language is selected if you support multiple languages.
    4. Under Order articles by, select an option for how you’d like articles to appear in this section.

      If you select to manually order of articles, see Manually changing the order of articles to change the order of your articles.

    5. Under Hierarchy, click in the field, then select where you’d like this section to appear in your Help Center.

      On Guide Lite and Professional, you must select a category as the parent for this section. Sections cannot contain sections.

      On Guide Enterprise, you can select a category or a section as the parent for this section. You can nest sections in sections for a maximum of five section levels, with up to 20 sections in a section.

    6. (Guide Enterprise) If you have multiple section templates in your live theme, click the Template menu, then select a template.

      If you do not select an alternate template, the default section template will be applied.

    7. Click Add.

      The section is created. Remember, if you have only one category, then the category itself is hidden to end-users, and users see only the sections that are in your Help Center.

    Deleting categories and sections

    When you delete a category, all the sections contained in the category are also deleted, and all the articles contained the sections are archived.

    When you delete a section, all the articles contained in the section are archived.

    To delete a category or section

    1. Do one of the following to edit the category or section you want to delete:

      • In Help Center, navigate to the category or section you want to delete, then click Edit section in the top menu bar.

        Edit section

      • In Guide Admin, click the Arrange content (Arrange content icon) icon in the sidebar and drill down to the category or section you want to delete. Click the options menu at the end of the section title, then select Edit category or Edit section.

        Arrange articles

    2. Click Delete in the bottom of the sidebar.
    3. Confirm that you want to delete the category or section.

      Alternatively, to delete a category or section, you can click Articles > Arrange articles, then click the name of the category or section you want to delete (you’ll have to expand a category to see its sections).

      In the edit page, click Delete in the bottom of the sidebar.

      You cannot recover deleted categories or sections. Any articles contained in a deleted section are archived and you can restore archived articles to another section if you need to.

    Working with category and section drafts

    If you create a category or section that is a work in progress, and want to restrict who can access it, you can mark it as a draft. Marking a category or section as a draft applies the draft status to any elements within it.

    The steps for marking a newly-created category or section as a draft are slightly different than those for marking an existing category as a draft.

    To mark a newly-created category or section as a draft

    1. Create and save a new section or category, as described in Adding a category to your knowledge base or Adding a section to your knowledge base.

      The section or category is created and remains open for editing.

    2. Click the Mark as draft option in the sidebar.

      Mark as draft

    3. Click Update at the top of the page.

    To mark an existing category or section as a draft

    1. Open the category or section in edit mode, as described in Editing categories and sections.
    2. Click the Mark as draft option in the sidebar.
    3. Click Update at the top of the page.

    Categories and sections marked as drafts are not viewable by end-users, and can only be accessed by Guide Managers.

    To determine whether a category or section is marked as a draft

    • Open the category or section in edit mode, as described in Editing categories and sections.
    • An existing category or section in draft mode section in draft mode is indicated by the Draft label at the top of the edit page:

    Section in draft category

    • A new section added to a category in draft mode displays a banner at the top of the page:

    Draft_category

    When the category is published, the section is no longer in draft mode, and the banner is removed. However, if the section is manually marked as draft, it will remain in draft mode until the marker is removed.

  • Moving and reordering sections and articles

    As your Help Center grows, you may find that you need to move existing sections from one category to another, or move articles from one section to another.

    Moving a section to a different category

    You can to move an existing section from one category to another.

    There are two ways to do this. You can either navigate to the section in Help Center and edit it or you can navigate to the section in Guide Admin and move it.

    To move a section to a different category in Help Center

    1. In Help Center, navigate to the section you want to move, then click Edit section in the top menu bar.

      Edit section button

    2. Under Hierarchy in the sidebar, click the name of the current category.
    3. Select a new category for the section, then click Select.

      You can search for or navigate to the category. All of your categories might not appear in the window.

    4. In Edit section, click Update.

    To move a section to a different category in Guide Admin

    1. In Guide Admin, click the Arrange content (Arrange content icon) icon in the sidebar.
    2. In Arrange articles, drill down to the section you want to move.
    3. Click the options menu at the end of the section title, then select Move to.

      Arrange articles option menu

    4. Select a new category for the section.

      You can search for or navigate to the category. All of your categories might not appear in the window.

    5. Click Move.

    Moving an article to a different section

    You can move an existing article from one section to another.

    There are two ways to do this. You can either navigate to the article in Help Center and edit it or you can navigate to the article in Guide Admin and move it.

    To move an article to a different section in Help Center

    1. In Help Center, navigate to the articles you want to move, then click Edit article in the top menu bar.

      Edit article

    2. (Guide Enterprise only) Click Article settings.
    3. Under Publish in section, click the name of the current section.
    4. Select a new section for the article, then click Ok.

      You can search for or navigate to the section. All of your categories might not appear in the window.

    5. In Edit article, click Update.

    To move an article to a different section in Guide Admin

    1. In Guide Admin, click the Arrange content Arrange content icon) icon in the sidebar.
    2. In Arrange articles, drill down to the article you want to move.
    3. Click the options menu at the end of the article title, then select Move to.

      Arrange articles options menu

    4. Select a new section for the article.

      You can search for or navigate to the section. All of your categories might not appear in the window.

    5. Click Move

    The article is moved to the new section.

  • Viewing and restoring archived articles

    You can access a complete list of your archived articles. You can restore an article from your archived list if you want to make it available again in your knowledge base.

    You must be a Guide Manager to view and restore archived articles. For information about archiving an article, see Archiving an article to remove it from your knowledge base.

    Viewing the archived articles list

    You can access a complete list of your archived articles. An archived article remains in your list unless you delete it.

    You must be a Guide Manager to view archived articles.

    To view a list of archived articles

    1. In Guide, click the Manage articles (Manage articles) icon in the sidebar.

      The Lists tab opens by default.

    2. Click Archived articles.

      Archived articles

      A list of your archived articles appears. You can add filters to view a subset of all your archived articles.

    Restoring an archived article

    You can restore an archived article if you want to make it available again in your knowledge base. You cannot disable the ability to restore articles. If you need to restore multiple articles at once, see Updating knowledge base articles in bulk.

    You must be a Guide Manager to restore archived articles.

    To restore an archived article

    1. In Guide, click the Manage articles (Manage articles) icon in the sidebar.

      The Lists tab opens by default.

    2. Click Archived articles.

      A list of your archived articles appears.

    3. Find and select an archived article from your list.

      You can browse, search, or add a filter to find a specific article.

    4. In the archived article, click Restore.

      The article is restored as a draft or work in progress, depending on your plan type, in the section where it was previously published. If the section no longer exists, you are prompted to select a new section.

    5. When you are ready to publish the article, click the drop-down arrow on the Save button, then select Publish now.

  • Updating articles in bulk

    From an articles list, you can update one or more articles at once using the bulk actions options. For example, you can publish a batch of articles at once or add a labels to several articles.

    You can make the following updates using bulk actions:

    • Archive or restore articles
    • Delete articles
    • Change author
    • Open or close for comments
    • (Guide Professional and Enterprise) Change labels on articles
    • (Guide Professional and Enterprise) Change user permissions
    • (Guide Enterprise only) Assign or unassign articles
    • (Guide Enterprise only) Submit articles for review
    • (Guide Enterprise only) Submit articles for approval
    • (Guide Enterprise only) Schedule articles for publishing
    • (Guide Enterprise only) Schedule articles for unpublishing
    • (Guide Enterprise only) Verify or unverify articles
    • (Guide Enterprise only) Change article owner
    • (Guide Enterprise only) Publish or unpublish articles

    To update articles in bulk

    1. In Guide, click the Manage articles (Manage articles) icon in the sidebar.
    2. Find the articles you want to update by browsing, searching, or using a new or existing articles list.
    3. Select one or more articles to update.

      You can select a maximum of 30 articles at a time. To select 30 items at once, click the check box beside the number of results at the top.

      Select all

    4. Click one of the bulk actions menus at the bottom, then select an option.

      The bulk actions that are available depend on your plan.

      Actions select

    5. Click to confirm that you’d like to perform the action, or enter your update, if necessary.

      Some actions require an additional step:

      • For assign, select a team member and enter a note, then click Assign.
      • For change labels, select or deselect labels to add or remove them or enter a new label, then click Change.

      For more information, see Updating article labels in bulk.

      • For restore, select a section for the article, then click Restore.
      • For scheduled publishing and unpublishing, click to create a schedule to publish or unpublish an article. Select a date, time, and time zone, then click Schedule.

      You can select both check boxes to create a publish schedule and unpublish schedule in one action.

      The action is applied to all the selected articles.

  • Using labels on your articles

    Labels are a single word or a multiple word phrase you can add to the default language version of a specific article in Help Center. You can use labels to influence article search relevance, to influence Answer Bot results (if you are using Answer Bot), or to create a list of related articles based on labels.

    You can add and remove labels on individual articles or you can change labels on multiple articles at once. You must have Guide Professional or Enterprise to use article labels.

    Adding and removing labels on individual articles

    Labels are a single word or a multiple word phrase you can add to the default language version of an article in Help Center. You can add articles labels for multiple purposes, including to influence search and Answer Bot results or to create article lists (see Understanding why to use labels).

    You can add and remove labels on individual articles or you can change labels in bulk for multiple articles at once.

    To add or remove labels to an article

    1. In Help Center or Guide, navigate to the article where you want to change labels, then click Edit article in the top menu bar.

    2. (Guide Enterprise only) If you are on Guide Enterprise, click Article settings. This step is not necessary on Guide Professional.

    3. In Labels in the right sidebar, start typing the label you want to add, then select Add as new label or select the matching label, if it exists.

      You might have to scroll down to see labels. See Best practices for adding labels below.

      Article labels

      Labels live on the default language article and not on translations of the article. If you have translations, you can add labels in multiple languages to the default article.

    4. Add multiple labels as needed.

    5. If you need to remove a label, click the x beside the label name.

    6. Click Save.

    You must manage labels on each individual article or using the API. There is no global management for article labels.

    Changing article labels in bulk on multiple articles

    You can add or remove labels to on multiple articles at once.

    1. In Guide, click the Manage articles (Manage articles) icon in the sidebar.

    2. Find the articles you want to update by browsing, searching, or using a new or existing articles list.

    3. Select one or more articles to change labels.

      You can select a maximum of 30 articles at a time.

      Article bulk actions

    4. Click the Article settings menu at the bottom, then select Change labels.

    5. Do any of the following:

      • Add a new label: Enter the label, then click Add as a new label.

      Bulk label add new

      • Add an existing label: Search or browse to find the labels you want to add, then select any empty checkbox or any checkbox with a minus.

      The minus sign (minus
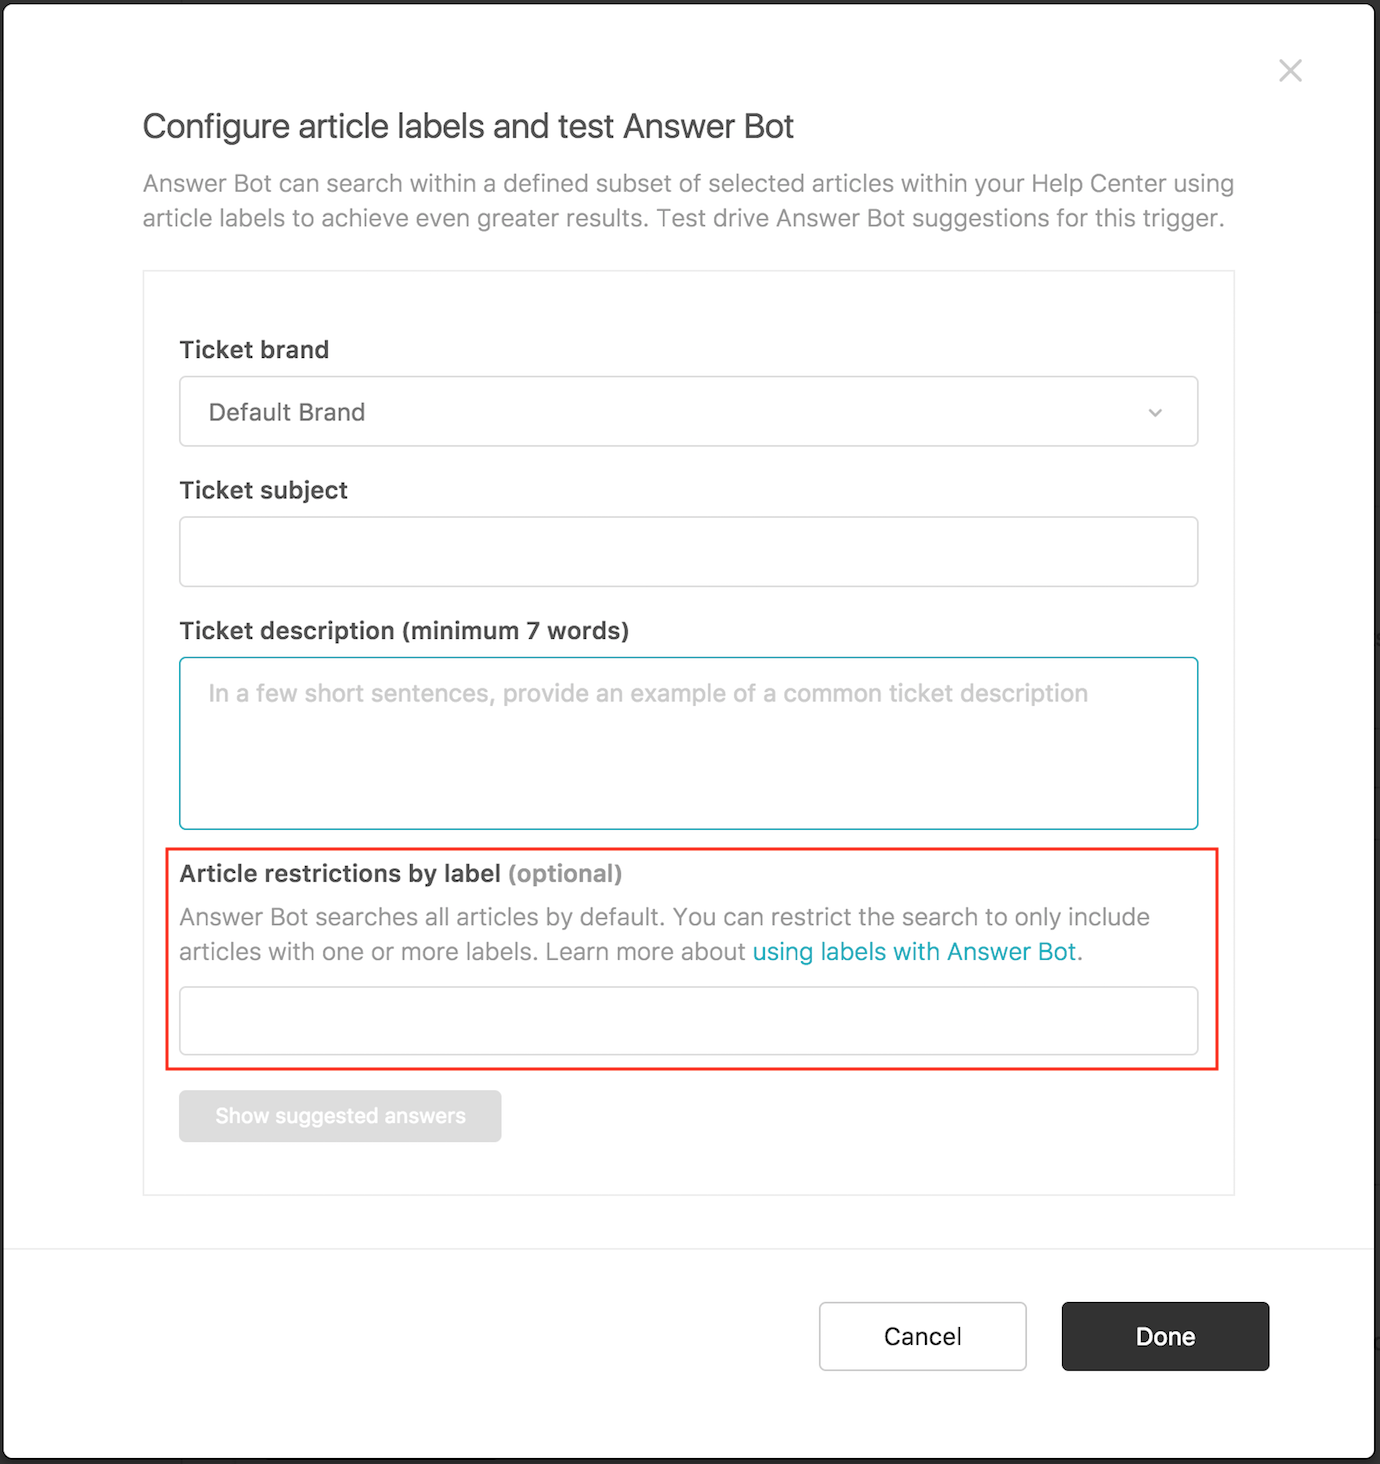
) indicates that the label appears on some but not all of the selected articles. When you select it, it changes to a checkmark (checkmark), indicating that it will be added to any selected article that doesn’t already have that label.

      You can select multiple labels to add to the selected articles.

      Select existing

      • Remove an existing label: Search or browse to find the labels you want to remove, then deselect one or more labels.

      The checkmark (checkmark) indicates that the label appears on all of the selected articles. The minus sign (minus) indicates that the label appears on some but not all of the selected articles. When you select a checkbox with a minus sign, it changes to a checkmark.; click it again to deselect the checkbox.

      You can select multiple labels to add to the selected articles.

      Remove labels

    6. Click Change.

      The label changes are applied to the selected articles.

    Understanding why to use labels

    Labels have the following uses and impacts:

    • Influence article search relevance

      Adding labels can make your articles more search friendly. They are not designed to be used for fine-grained control of ranking. For example, if I have two articles about making waffles, one with the word “temperature” in the body of the article, one with the label “temperature”, the labeled article will be ranked higher if a user searches for the word “temperature”.

      Labels are indexed for search with a bit less weight than the article title, but multiple labels with similar words can outweigh the title and body of the article. Use labels carefully as you can significantly impact the relevance of your search results and usefulness. If you are considering using labels to impact search relevance, consider that efforts to do so could end up with inferior ranking performance for your users. The best way to have your article perform well in search is to create a short and focused article, where the title and body include keywords and clearly connect to each other.

      To learn more about search, see How end-user search works in Help Center.

    • Influence Answer Bot results

      Answer Bot uses labels to influence the results it shows. It allows you to define a whitelist of articles that are allowed to be used when looking for relevant matching results. You are able to add up to ten labels that serve as an OR filter, allowing you to expand the whitelist to any articles containing any of the defined labels.

      To learn more about Answer Bot, see About Answer Bot.

    • Create article lists

      Article lists enable you to get an overview of all your published and unpublished knowledge base content, and then refine that view by using search and applying filters to build article lists. For example, you can find articles that have a specific article label, such as out-of-date.

      To learn more about article lists, see Creating article lists to different views of your knowledge base content.

    Best practices for adding labels

    Labels can help boost the search relevance of an article. However, you should use labels carefully and sparingly. It’s more important to make sure the article title and body contain the relevant keywords.

    • Use single word labels where possible, instead of multi-word phrases

      It is possible to add labels as single words or as multiple words or phrases. In general, it’s more efficient to use single word labels. If you add a multi-word label, the search engine breaks it into individual words to perform the search. For example, if you have a label of “late delivery,” it gets broken down into “late” and “delivery” for search.

      Avoid using long phrases as labels to boost an article’s ranking with respect to a query. For example, “Can I return something I ordered online to my local store.” Instead, you should modify the article’s title or content to make it literally relevant to the query.

    • Do not include variations of the same word, including different tenses or plural forms

      You do not need to include multiple labels for variations of a word. For example you do not need a label for “return” and “returns” or “update” and “updated.” Search stemming allows different forms of the same word to match. In particular, the singular and plural forms of a word will generally match.

    • Use a limited number of labels, instead of overloading an article with labels

      Use labels sparingly. Adding lots of labels might actually diminish any matches on labels. This is because it is assumed that matches with a fewer number of labels beats matches with more labels. And too many labels might outweigh the relevance of the title and body.

      For example, if article 1 has the labels “car,” “automobile,” and “transport” and article 2 has only the label “car,” all other things equal, if the end-user searches for “car,” the article that has only the label “car” will rank higher. That is because, as a general principle, an article that is about one specific thing is more relevant than an article about many things, when a user is looking for that one specific thing.

      The number of labels for search is limited to 200. The search engine will use the first 200 labels and ignore any additional labels.

      Your best bet is to look at the top ranked search queries and make sure that they exist in either (but not both) the title or the labels. You don’t give content an extra boost if you match a term across the title, body, labels, and comments.

    Using the Help Center API to filter articles by labels

    There are two ways you can filter articles by labels using the Help Center API:

    • Article: /api/v2/help_center/en-us/articles.json?label_names=foo​
    • Search: /api/v2/help_center/en-us/articles/search.json?label_names=foo

    These two endpoints behave differently and will return different article results. They are programmatically different and query different data sources for their results.

  • Importing Google Docs as articles

    You can import Google Docs into your Guide knowledge base. You can import up to 100 docs at a time. This is a great way to add new content or migrate existing content to your knowledge base.

    When you import a Google doc, there is no connection between the new article and the original Google Doc; the article is not synced with the Google Doc. You cannot export articles from your knowledge base to Google Docs.

    You must be a Guide Manager to connect to a Google Drive and import Google Docs.

    To import a Google Doc

    1. In Guide, click the Arrange content (icon_arrange_content) icon in the sidebar, then click Import articles.

    2. Click Connect to sign in to your Google account, if you are not already signed in.

      If you have not yet connected Guide to your Google Drive account, clicking Connect takes you through the process of signing in to your account and granting Zendesk Guide.

      Google Docs importer

    3. Click Next.

    4. In Select documents, click Open file picker.

      You will see all the folders and files that you have access to.

      Google Docs file picker

      Use the options in the upper-right to toggle between grid and list view or to sort your files.

    5. Search or navigate to the file(s) you want to import, then click Select.

      You can select up to 100 files to import at a time.

      The file appears in the Import Articles admin page. You can click Redo document selection if you need to choose a different file.

    6. Click Next.

    7. In Place documents, click Select section to choose a section in your Help Center for this article.

      The articles will not be published when they are imported. Docs are imported as draft articles (Lite and Professional) or work in progress articles (Enterprise).

    8. Click Next.

    9. In Start import, click Start import.

      Don’t close the window while the importer runs. The time it takes depends on how many docs you are importing.

      Your docs will be imported as draft articles (Lite and Professional) or work in progress articles (Enterprise).

    10. When the import finishes, click Have a look to go to Arrange articles and find your articles or click Start a new import to import more Google docs.

      There is no connection between the resulting new articles and the original Google Docs; the articles are not synced with the Google Docs.

      To access your articles later, you can find them in your list of drafts or your list of work in progress (Enterprise).

Working with articles

  • Creating and editing articles

    Guide managers can create new articles and edit all existing articles in the knowledge base. Agents who are not Guide managers can create and edit articles if they have management permissions. End-users can’t contribute articles to the knowledge base.

    Light agents on Guide Lite and Professional cannot create or edit articles. Light agents on Guide Enterprise and Legacy can create and edit articles where they have permission.

    You must have at least one section in the knowledge base before you can start adding articles. When you create an article, you must assign it to a section. For more information, see Anatomy of the Help Center.

    Adding articles to the knowledge base

    Guide managers can create new articles. Agents can create new articles if they have management permissions. Agent privileges for new articles vary depending on their management permissions. See the complete list of agent privileges for existing, published articles.

    You can create a maximum of 40,000 total articles, including translations. This limit includes articles in all states, except archived.

    To add an article to the knowledge base

    1. In Help Center or Guide, click Add in the top menu bar, then select Article.

      Add options

    2. Enter your content.

      • Use the article editor’s toolbar for formatting options or to add links, images, or tables. This toolbar is not the same as the toolbar in community posts.

        Article editor

        For information, see the Help Center article editor toolbar reference. See also Inserting links, Inserting images, and Inserting videos. For tables, check out this formatting tip.

      • Edit the HTML source by clicking the Source Code button at the end of the editor’s toolbar.

        Help Center quarantines unsafe HTML tags and attributes to reduce the risk of malicious code. For information, see Allowing unsafe HTML in pages.

    3. Under Managed By, click the drop-down arrow, then select management permissions to determine which agents have editing and publishing rights for this article.

      • Managers enables only Guide Managers to edit and publish the article. This option is selected by default on new articles.
      • Editors and publishers (Enterprise only) enables all agents and managers to edit this article but only managers can publish the article. This option appears only if it’s been activated.
      • Custom management permission (Professional and Enterprise) enables specific user segments to edit and publish the article.

      Depending on your account, you might also see an agents and managers option.

      Guide Managers can apply any management permissions. Agents with management permissions can apply only the management permissions they belong to. Agents who do not have management permissions on any article will not see this option, and the management permissions will default to managers.

    4. Under Visible to, select one of the view permissions options to determine which users can view this article.

      • Visible to everyone includes anyone who visits Help Center and does not require sign in.
      • Signed-in users includes internal and external users who create an account and sign in to your Help Center.
      • Agents and managers (Professional and Enterprise) includes staff members only, so that you can create content that is internal-only.
      • Custom user segment (Professional and Enterprise) enables you to restrict viewing access to specific users based on tags, organizations, or groups by applying custom user segments (see Creating user segments to restrict access).

      Guide managers and agents with publishing permissions can set view permissions for articles. Agents who do not have publish permissions on any article will not see this option, and the view permissions will default to agents and managers.

    5. Under Publish in section, click Select a section, then select a new section and click Ok.

      You can search for or navigate to the section. All of your categories might not appear in the window. To navigate, click the expander arrows to drill down to the section you want.

      Publish in section

    6. Chose any of the following options:

      • To close the article for comments, deselect Open for comments.
      • To promote the article in its section, select Promote article.
      • To add an attachment, click Upload attachment on the lower side of the editor.

      The file size limit is 20 MB. You can remove an attachment by clicking the x next to it.

    7. (Guide Professional and Enterprise) Under Labels, add any labels you want.

      As you start typing, a list of existing labels appears for you to chose from, or you can add a new keyword by selecting Add as a new label or by typing a word and pressing Enter.

      Add new label

      For more information about using labels and best practices, see Using labels on Help Center articles.

      You can add labels to the default language article only and not to translations of the article. You can add labels in multiple languages to the default article.

    8. (Guide Enterprise) Under Template, if you have multiple article templates in your live theme, click the drop-down, then select a template.

      You might have to scroll down to see this option. If you do not select an alternate template, the default article template will be applied.

      Select template

    9. When you are finished working on your article, do one of the following:

      • To save your new article as a draft or work in progress to publish later, click Save.

        Save button

        Clicking Save creates the article as a draft (Guide Lite and Professional) or a work in progress (Guide Enterprise).

        Click the Preview in Help Center link (Guide Lite and Professional) or the Preview link (Guide Enterprise) to view the article in your Help Center. The preview link expires after one hour.

      • To publish your new article, click the drop-down arrow on the Save button, then select Publish now.

        Clicking Publish now creates the article and publishes it in your Help Center.

        Click the Show in Help Center link (Guide Lite and Professional) or the Published link (Guide Enterprise) to view the article in your Help Center.

    For information about how you can display an article in multiple sections, see Displaying an article or section in multiple sections or categories in our Support tech notes.

    Editing articles in the knowledge base

    Guide managers can edit any articles. Agents can edit existing articles where they have management permissions. Agent privileges for existing articles vary depending on their management permissions. See the complete list of agent privileges for existing, published articles.

    On Guide Lite and Professional, you cannot save edits for an existing published article. On Guide Enterprise, you can save edits for an existing published article as a work in progress.

    There are some article updates that you can make on multiple articles in bulk. For more information, see Updating knowledge base articles in bulk.

    To open an article in edit mode

    • In Help Center, navigate to the article you want to edit, then click Edit article in the top menu bar.

      Edit article

    • In Guide Admin, click the Manage articles (Manage articles icon) icon in the sidebar, search for the article, then click the title to open it.

    • In Guide Admin, click the Arrange content (Arrange articles icon) icon in the sidebar, navigate to the article, then click the options menu at the end of the title and select Edit article.

  • Using the article editor toolbar

    The Help Center article editor contains a toolbar you can use to format your knowledge base articles. The article toolbar is not the same as the toolbar that appears in community posts.

    Editor bar

    The following table describes the formatting options that are available.

    Toolbar button Name Action
    hc_article_toolbar_headings Paragraph Insert HTML headings
    hc_article_editor_font_size Size Increase or decrase font size
    Bold1 Bold Bold or unbold text
    Underline1 Underline Underline or remove underline from text
    color1 Text color Change text color using the color selector
    Italic1 Italic Italicize or remove italics
    Numbered1 Numbered list Create or remove a numbered list
    Bulleted1 Bulleted list Create or remove a bulleted list
    Align_indent Align/indent Align text left, center, or right; indent or outdent text
    link Insert/edit link Create or edit a link and link text. You can link to a URL, heading in the article, or another article. See Inserting links.
    insert_image Insert image Insert an image using the file browser. The image file size limit is 20 MB. See Inserting images.
    video1 Add video Insert a video that is hosted on a supported service. See Inserting videos.
    Table1 Table Create or modify tables using the menu options
    code1 Source code View or edit the HTML source code
  • Inserting videos in articles

    You can insert videos in the body of your Help Center knowledge base articles, either through the article editor toolbar, or by embedding code in your article.

    Inserting videos from the article editor toolbar

    Guide supports a number of third-party video hosting services as standard. If your video is hosted on one of the following supported video hosting services, you can insert directly from the article editor toolbar:

    • Vimeo
    • YouTube
    • Wistia
    • JWPlayer
    • Brightcove
    • Vidyard
    • Loom

    If you are using Web Widget on your website or Help Center, your end-users can stream videos in Help Center articles directly in the Web Widget. To display correctly in the Web Widget, videos must be publicly available, and hosted on one of the supported third-party services.

    To insert a video in an article using the article editor toolbar

    1. Copy the URL for your video.

      Your video must be hosted on Vimeo, YouTube, Wistia, JWPlayer, Brightcove, Vidyard, or Loom. If your video is on one of the supported services, you can use this procedure to insert your video. You do not need to enable the option to allow unsafe content in your Help Center to do so.

      If your video is not hosted on a supported provider, you’ll need to insert the video by embedding code).

    2. In Help Center or Guide Admin, edit an existing article or create a new article.
    3. Place your cursor where you want the video to appear, then click Add video on the editor’s toolbar.

      Add video button

    4. Paste the video’s URL in the dialog box.

      A preview of the video appears.

      Add video

    5. Click Insert.
    6. When you are ready, click Save.

    Inserting videos by embedding code

    If your video is hosted on a non-supported service, use the article source code editor to add the video’s embed code to insert the video. Be aware that this means you must allow unsafe HTML (see Allowing unsafe HTML in pages).

    Some third-party video hosting services do not count video views unless you have manually embedded the code to insert the video. Use the embed method if you need to track video views as part of your analytics.

  • Inserting images in articles

    You can insert images in the body of your Help Center knowledge base articles. When you insert images, they are added as attachments to the article. Large images are automatically resized to fit the width of the article.

    Be sure to insert the image, as opposed to copying and pasting the image from another source, to avoid image issues. As an alternative to inserting images directly in your articles, you can host your images on a public file server and link to them.

    To insert an image in an article

    1. In Help Center, create a new article or edit an existing article.
    2. Place the cursor where you want the image to appear.
    3. Do one of the following:

      • Drag and drop the image into the body of the article.
      • Click the Insert image button on the toolbar, then click Upload images and select your image.

      Insert image

      The image file size limit is 20 MB.

      Images are automatically adjusted to fit the width of the article, using a compression feature within CSS. It’s a good idea to manually resize images that are more than 1600px wide, as the compression might cause the image to appear distorted in the published article. You also might want to manually resize images if you are using Web Widget (see Optimizing images for Web Widget below).

    4. Click Insert in the dialog that appears.

      The image appears in your article.

    5. Click Save.

    If you have a closed Help Center that requires all users to sign-in, article images will appear broken in email notifications sent to users who are following your Help Center. This is a known issue.

    Optimizing images for the Web Widget

    To make sure the images in your Help Center articles display correctly in the Web Widget, it’s important that the images are added to the article at the desired size.

    When Help Center articles are converted for viewing in the Web Widget, the article’s images are stripped of their attributes in the HTML tags (except for the src and alt attributes), and custom CSS rules are ignored. For most images this isn’t a problem, however if the original images are very big they can appear awkwardly large.

    Resizing the original image to the size you want, rather than manipulating the size using CSS or width and height attributes, ensures that images will be displayed properly.

  • Inserting and editing links in articles

    Guide managers can create, edit, and remove links in any new or existing article in the knowledge base. Agents who are not Guide managers can create, edit, and remove links in articles where they have management permissions.

    You can insert a link in an article for existing text or at the point where your cursor appears.

    To insert a link in an article

    1. In Help Center or Guide Admin, create a new article or edit an existing article.

    2. Highlight text or place the cursor where you want the link to appear, then click Insert/edit link on the editor’s toolbar.

      Insert/edit link

    3. In the dialog box, do one of the following:

      • To link to a URL, in the URL tab, paste in the link URL. For example, https://zendesk.com

        Make sure you include the entire URL, including the HTTP or HTTPS format. If you don’t add the entire URL, you’ll get a broken link.

      • To link to a heading in this article, click the Heading tab, then select a heading in the article.

        The title of each heading appears, along with it’s style, so that you know the heading level for each heading in the article.

      • To link to an article in your Help Center, click the Help Center article tab, then select an article title that appears or enter a search for an article, then select an article that appears.

        Click Clear beside the article title if you want to remove the link to an article and select a new article.

    4. In Text on link, enter or edit the link text you want to appear in the article.

      If you highlighted text in the article before you click the Link button, the text appears in the field. If you edit the text here, it will update in the article.

    5. Select Open in new tab if you’d like the link to open in a new browser tab.

      If the checkbox is not selected, the link will open in the current browser tab, replacing the article.

    6. Click Link.

      The link appears in the article.

    You can edit any existing link in an article to change the text or link target.

    To edit an existing link article

    1. In Help Center or Guide Admin, open an existing article in edit mode.
    2. Highlight the link you want to edit in the article.
    3. To change the link text, simply type over the existing text.
    4. To change the link target, click Insert/edit link on the editor’s toolbar, then do any of the following:

      • In the URL tab, select the existing URL in the field and paste in a new URL, then click Link.
      • Click the Heading tab, select a heading in the article, then click Link.
      • Click the Help Center article tab, click Clear, if an article is currently selected, and select another article in your Help Center, then click Link

      The link is updated in the article.

    You can remove a link from text if you want to the text to be plain text and no longer a link.

    To remove an existing link in an article

    1. In Help Center or Guide Admin, open an existing article in edit mode.
    2. Highlight the link you want to remove in the article.
    3. Click Insert/edit link on the editor’s toolbar, then do any of the following:
    4. Click Remove link at the bottom of the dialog box.

      Remove link

      The link is removed from the article.

  • Promoting an article

    You can promote articles in a section to draw attention to them. When you promote an article, it moves to the top of the articles list within its section and is usually given a special visual treatment (for example, a star icon).

    Promoted articles always appear at the top of the section, regardless of the sorting option chosen. Promoted articles might also appear by default on the home page, depending on your chosen theme.

    Promoted article

    To promote an article

    1. Navigate to the article, then click Edit article in the top menu bar.

      Edit article

    2. Click Promote article in the article’s sidebar.

      Promote article

    3. Click Save.

  • See all 7 articles

Managing Community topics

  • Editing and deleting discussion topics

    The community consists of posts associated with different discussion topics. Topics can be anything you want, and you can create as many as you want. Guide managers can add, edit, delete, and manually arrange topics. Agents and moderators don’t have the permissions to make these changes.

    Editing and deleting discussion topics

    You can edit a discussion topic if you need to change the name, description, or access privileges.

    You can delete a topic if you no longer need it. When you delete a topic, all the posts in the topic are also deleted. If you don’t want to delete the posts in the topic, move the posts before you delete the topic.

    To edit a topic

    1. Open the topic in Help Center, then click Edit topic in the top menu bar.

      Edit topic

    2. Make your changes to the name or description and click Update.

    For information about managing community posts within discussion topics, see Managing community posts.

    To delete a topic

    1. Open the topic in Help Center, then click Edit topic in the top menu bar.

      Be sure you’ve moved any posts that you want to save to another topic.

    2. Click the Delete topic link on the page.

    Reordering discussion topics

    You can manually reorder your community discussion topics. You cannot reorder the posts within a topic.

  • Adding discussion topics

    The community consists of posts associated with different discussion topics. Topics can be anything you want, and you can create as many as you want. Guide managers can add, edit, delete, and manually arrange topics. Agents and moderators don’t have the permissions to make these changes.

    For information about managing community posts within discussion topics, see Managing community posts.

    Adding discussion topics

    Discussion topics can be anything you want and you can add as many topics as you need.

    For example: if you support multiple products you might add a topic for each product or, if you have one product with a lot of functionality, you might add a topic for each major feature area. You can also add a General Discussion topic where users can discuss issues that don’t quite fit in the other topics.

    To add a topic

    1. Click Add in the top menu bar, then select Community topic.

      Add topic

    2. Enter a Name and optional Description for your section.
    3. Select a User segment to determine who can access this topic.

      By default, a topic is visible to all users. You can choose to restrict access to signed-in users.

      On Guide Professional and Enterprise, you have the ability to restrict access based on tags, organizations, or groups by applying custom user segments (see Creating user segments to restrict access). On Guide Professional and Enterprise, you can also restrict access to agents and managers to create internal-only access.

    4. Under Who can manage posts, select Managers if you want only Guide Managers to add and edit posts, or leave Agents and managers selected if you want agents to also be able to add and edit posts in this section.
    5. Click Add.
  • Reordering discussion topics

    The community consists of posts associated with different discussion topics. Topics can be anything you want, and you can create as many as you want. Guide managers can add, edit, delete, and manually arrange topics. Agents and moderators don’t have the permissions to make these changes.

    Reordering discussion topics

    You can manually reorder your community discussion topics. You cannot reorder the posts within a topic.

    To manually reorder topics

    1. In Guide, click the Arrange content (Arrange articles icon) icon in the sidebar, then click Arrange topics.
    2. Click any community topic, then drag it to another place in the order.

      Arrange topics

    3. Click Save when you’re finished.

    For information about managing community posts within discussion topics, see Managing community posts.

  • Creating user segments

    Tags, groups, and organizations are not available on Support Essential. To create user segments, you must have Support Team, Professional, or Enterprise and Guide Professional or Enterprise. If you have Gather Professional, you need Support Team, Professional, or Enterprise and any Guide plan.

    A user segment is a collection of end-users and/or agents, defined by a specific set of attributes, used to determine access to Help Center content.

    User segments are the building blocks for user permissions. You apply user segments to a knowledge base article or a topic in your community to define viewing access. And you use user segments to build management permissions that you apply to knowledge base articles to define editing and publishing permissions.

    There are two built-in user segments by default:

    • Signed-in users includes users who are signed-in to your Help Center
    • Agents and managers includes all agents and Guide managers

    You can create custom user segments to further refine those groups of users as follows:

    • Signed-in users (internal and external), based on tags, organizations, or both created in Zendesk Support
    • Staff (internal), based on tags, groups, or both created in Zendesk Support

    Guide Managers have access to all content, regardless of any user segments they belong to. You must be a Guide Manager to create user segments.

    Understanding access restrictions for user segments

    Every user segment starts with a base user type of signed-in users or staff (agents and managers). From there, you can create a subset of users based on tags, organizations, and groups, as follows:

    • Signed-in users can be restricted by tags, organizations, or both. Tags must be on the user or an organization they belong to.

      When you create a user segment based on tags for signed-in users, you can require that all specified tags match for the agent to be included and/or you can require that at least one of the specified tags match for the user to be included. For organizations, the user must belong to at least one of the specified organizations.

      Signed-in agents must have any required tags, but organization is ignored for agents; agents do not have to belong to any of the specified organizations to be included in the user segment.

    • Staff (agents and managers) can be restricted by tags, groups, or both.

      When you create a user segment based tags for staff, you can require that all specified tags match for the agent to be included and/or you can require that at least one of the specified tags match for the agent to be included. For groups, the agent must belong to at least one of the any specified groups.

      Guide Managers have access to all content, regardless of the user segments they belong to.

    You can define user segments as shown in the following table.

    User role Restrict by tags (users need all tags) Restrict by tags (users need any of the tags Restrict by organizations (users need at least one org) Restrict by groups (users need at least one group)
    Signed-in users Yes Yes Yes No
    Staff Yes Yes Yes No

    Creating user segments

    There are two access types for user segments: signed-in users and staff.

    You can create custom user segments to further refine those groups of users as follows:

    • Signed-in users (internal and external), based on tags, organizations, or both created in Zendesk Support
    • Staff (internal), based on tags, groups, or both created in Zendesk Support

    You can create as many as 200 user segments per account. If you have multiple brands in your account, your user segments are shared across all brands.

    Guide Managers have access to all content, regardless of any user segments they belong to.

    To create a user segment

    1. In Guide, click the User permissions icon (User permissions) in the sidebar.
    2. On the User Segments page, click Add new.

      If you receive an error message, then you have reached your maximum number of 200 user segments. You can delete some user segments if you want to continue.

    3. Enter a Name for this user segment.
    4. Select a User type as the base of your user segment.

      • Signed-in users include internal and external users who create an account and sign in to your Help Center.
      • Staff are internal users only, including agents and Guide managers.

      Create user type

    5. Click Next.
    6. Click Add tag, then click the drop-down menu to select a tag.

      • If you add tags under Users and organizations matching all of these tags, all of the tags must be on the user or org to be included in the user segment.
      • If you add tags under Users and organizations matching any of these tags, one or mor of the tags must be on the user or org to be included in the user segment.

      You can add up to 50 tags in Users and organizations matching all of these tags and up to 50 tags in Users and organizations matching any of these tags.

      You can search or scroll to find tags. Note that not all available tags appear in the list. You can choose any tag that is applied to existing users or organizations. The tags can be on the user profile or, for end-users, inherited through an organization.

      A list of matching users appears below. Any agents with the tag will belong to the user segment, but agents do not appear in the matching list.

      You must have user tags enabled to create a user segment based on tags (see Enabling user and organization tagging).

    7. If you want to add multiple tags, click Add tag again, then select a tag.
    8. You can further refine your user segment by doing one of the following:

      • For signed-in users, click Add organization if you want to restrict by org, then click the drop-down and select an org.
      • For staff members, click Add group if you want to restrict by group, then click the drop-down and select a group.

      The user must belong to at least one of the organizations or groups to be included in the user segment. The exception is that organization is ignored for signed-in agents. Agents do not need to belong to any of the organizations to be included in the user segment.

      The list of matching users updates, but, remember, agents do not appear in the matching list.

    9. Click Save.

      You can apply user segments to:

  • Applying user segments to community content

    By default community discussion topics are visible to all users. You can prevent some users from viewing the content of certain topics.

    You can configure a topic to restrict access to signed-in users or to agents and managers. You can also apply custom user segments you’ve created to further restrict access based on tags, organizations, or groups (see Creating user segments to restrict access).

    You must be a Guide Manager to set access restrictions for community topics. Viewing restrictions do not apply to Guide Managers. Managers can access all topics in the community, regardless of the restrictions.

    To restrict access to a community topic

    1. Navigate to the topic in the community that you want to restrict.
    2. Click Edit topic in the top menu bar.

      Edit topic

    3. Select a User segment to determine who can access this section.

      You can choose to:

      • Restrict access to signed-in users
      • Restrict access to agents and managers to create internal-only access
      • Restrict access based on tags, organizations, or groups by applying a custom user segment (see Creating user segments to restrict access)
    4. Click Update.

    To set access restrictions in the knowledge base, see Setting view permissions on articles with user segments.

  • Best practices for managing your community

    When you first launch a community with Gather, we recommend that you follow some basic steps and enable certain features to help you to guide your users and make managing your community easier.

    Writing a community code of conduct

    Before you launch your community, it’s important to write down what the rules of the space will be. This helps users to understand how to participate in your community, and what kinds of things won’t be allowed.

    In addition to letting users know the things you might not want them to do in the community, for example, posting spam or harassing others, also consider things like:

    • Is it ok for people to promote their business or solicit other users to contact them outside of your site?
    • Are there terms, phrases, or certain kinds of activity that will not be allowed in your community?
    • If a user violates any of the rules, how will they be enforced? It’s good to explain to users what will happen if they violate the code of conduct.

    Post the code of conduct in your community, and consider pinning it to the top of a topic. It should be easy for users to find and refer to.

    It’s important to revisit your code of conduct regularly, and make adjustments to the rules as required. If you have a legal team as a part of your organization, you might want to include them in the process or get their approval.

    Here’s the Zendesk Community Code of Conduct as an example.

    Setting up content moderation filters

    We recommend using the content moderation feature to help avoid spam and other inappropriate or abusive posts being published in your community.

    You can choose whether you want to moderate all posts, or just those matching certain keywords. You’ll need to evaluate which option will be best for your community, depending on the kind of audience you’ll be engaging, the size and capabilities of the team you have managing your community, and how much of a risk is posed by spam in your community.

    Moderating all posts can be very effective in eliminating any spam from getting through. However, it is best to use this feature only if you have a team that can be highly responsive in approving posts (that is, they can log in and approve content whenever a notification is received, or periodically during your community’s most active hours), or if your community is one that does not require speedy responses. This is because when the content is pulled into the moderation queue, the user has to wait for a Guide Manager to approve the post before it goes live, which can lead to a significant lag between when a user tries to make a post and when it actually appears in the community.

    Using the keyword function allows you to specify words that, when they’re present in a post, trigger the post to go into the moderation queue to be reviewed, and then either approved or rejected by a Guide Manager. This means that posts without any of the keywords are published immediately, which is preferable for a community trying to foster high conversational engagement. However, this option does run the risk of allowing some spam posts through on occasion, until the spam filter learns or a new keyword is added to the filter.

    See moderating end-user content to learn more about content moderation for your Help Center.

    Creating moderator groups and setting permissions

    The community moderator feature enables you to assign certain permissions to groups of users (agents and end-users) so that they can assist your community managers to moderate the community.

    This feature is not available with Gather Legacy. See About Gather plan types.

    Identify a group of trusted users or agents, and give them the ability to flag posts for moderation, so that they can help hide anything that shouldn’t be in your community or flag questionable content for your community managers to review.

    There are a variety of permissions that you can give to these groups, and you can set up multiple groups with different sets of permissions. To learn more, see creating community moderator groups.

    Creating your first few topics

    Start by creating two or three topics in your community. More than three topics can spread your users across too many spaces, especially when launching a new community.

    To determine what your initial topics should be, you should consider:

    • Your goals for the community
    • What your customers or users are most interested in talking about

    It can be helpful to look at support tickets that you already receive. See what areas come up most often, then create a topic in your community for users to discuss that topic. Your topics should be specific enough that users know what they’re supposed to do when they get there, but broad enough to apply to a wide variety of users.

    Fill in the description field for your topics, to help users understand what they’re supposed to post.

    Writing pinned “how to” and welcome posts in each topic

    In addition to the topic description, it is helpful to write a pinned post to explain to users what the space is for and how to best use it. If the code of conduct tells your users what not to do, this post tells them what you do want them to do.

    This step is especially helpful if you want to encourage users to post in a specific format, include specific information in their post, or use voting in a specific way.

    For example, your topic might be set up for users to share recipes. You want them to follow a format of listing the ingredients first and the recipe instructions second. You might also want them to vote on their favorite recipes. While this might seem intuitive, it will be helpful to explain what you want them to do.

    Another example might be collecting product feedback, where you want to encourage users to post which version of a product they’re using and answer some specific questions in their post.

    Here are some examples from the Zendesk Community, explaining to our users how to participate in different topics:

    • How to ask a question in the Zendesk Community
    • How to write an effective feedback post

    Customizing your theme

    As a bonus, consider customizing your community’s theme to make your new community’s look and feel match the rest of your website or brand. A common theme can help your users feel more at home and connected to the other ways they connect with your organization online.

    The Zendesk Guide theme is highly customizable. There are a number of free and paid themes available in the Zendesk Marketplace, or you can contact a Zendesk partner to assist in building a custom theme.

    More community resources

    If you have any questions about any of these recommendations, from writing your code of conduct to determining which kind of content moderation to use, or on setting up your moderator permissions, you can connect with Zendesk Gather experts in the Zendesk Community.

    Ask any questions specific to setting up or launching your community in the Gather Q&A topic.

Managing Community posts

  • Managing community posts

    You can edit, move, or delete community posts, as well as edit or delete comments on community posts. You can also take a number of actions on the post or comment.

    The user interface described in this article is based on the default Copenhagen theme. If your theme is customized, options might appear differently or be missing.

    Guide Managers have full permissions to manage community posts. Users with moderator rights can perform a limited number of actions on posts depending on their moderator group permissions. Regular agents, who are not part of a moderator group, don’t have permissions to take any actions on community posts.

    For information about managing the discussion topics that contain community posts, see Managing Help Center community discussion topics.

    Editing and deleting community posts

    You can edit or delete community posts as needed.

    To edit a post

    1. In the post you want to edit, click the Post actions icon (guide_post_actions_icon), then select Edit.

      Edit post

    2. Make your changes, then click Update.

    To delete a post

    1. In the post you want to delete, click the Post actions icon (Actions icon), then select Delete.
    2. Click Ok to confirm the deletion.

      The post is removed from the topic and cannot be recovered.

    Editing and deleting comments on community posts

    You can edit or delete comments on community posts as needed.

    You can also mark a comment as official (see Marking a comment as the official comment for a post).

    To edit a comment

    1. Beside the comment you want to edit, click the options menu, then select Edit.

      Edit comment

    2. Make changes, then click Update.

    To delete a comment

    1. Beside the comment you want to delete, click the Comment actions icon (Actions icon), then select Delete.

      The comment is removed from the post and cannot be recovered.

    Moving a post to another discussion topic

    You can move a post from one discussion topic to another in your community. You cannot move a community post to the knowledge base.

    To move a post to another topic

    1. In the post you want to move, click the Post actions icon (Actions icon), then select Edit.

      Edit post

    2. Click inside the Topics box and select another topic.
    3. Click Update.

    Promoting a post by pinning or featuring

    You can promote community posts by pinning or featuring.

    When you pin a post, it moves to the top of the posts list within its topic and has a star beside it. This enables you to draw attention to important posts in a topic, such as announcements or guidelines.

    Pinned posts always appear at the top of the topic, regardless of any sorting option chosen. The most recently pinned post will be the top-most. You can manually add styling for pinned posts so that they appear different than other posts in the topic.

    Pinned to top

    When you feature a post, it is labeled as “featured” and appears in the featured posts component, which you can add to any page in your theme.

    Featured post comment

    To pin a post

    • In the post you want to pin, click the Post actions icon (Actions icon), then select Pin to top.

    If you don’t want the post to be pinned to the top of the topic anymore, select Unpin from top.

    To add styling for pinned posts to your theme

    1. In Guide, click the Customize design (Customize icon) icon in the sidebar.
    2. In the Theme panel, click Edit theme.
    3. Select the Community post page in the template drop-down in the upper-left.
    4. Click Post actions.
    5. Click Pin to top.
    6. Click the CSS tab, then add the following CSS to style pinned posts or modify it to fit your design:

       .post-pinned .question-title:before {
         content: "\2605";
         margin-right: 5px;
         color: $color_5;
       }
      
    7. Click Save, then Publish changes.

    To feature a community post

    • In the post you want to feature, click the Post actions icon (Actions icon), then select Feature post.

      Feature post action

    You must have added the featured posts component to your theme for the post to be featured. Otherwise, selecting the feature post option does nothing.

    If you don’t want the post featured in the Featured Posts component anymore, select Unfeature post.

    1. In Guide, click the Customize design (Customize icon) icon in the sidebar.
    2. In the Theme panel, click Edit theme.
    3. Select a template from the template drop-down in the upper-left, then paste the following snippet of code where you want featured posts to appear (on your Home page, for example).

       <div class="featured-posts">
         <h2>
           {{t 'featured_posts'}}
         </h2>
         {{#if featured_posts}}
           <ul class="featured-post-list">
             {{#each featured_posts}}
               <li>
                 <a href="{{url}}">{{title}}</a>
               </li>
             {{/each}}
           </ul>
         {{else}}
           <p>
             {{t 'no_featured_posts'}}
           </p>
         {{/if}}
       </div>
      
    4. Click Preview at the top to ensure it looks as intended. To preview a featured post, use the preview window to the right of the theme editor, locate a post, click Post actions and click Feature post.
    5. Click Save, then Publish changes.

    Setting status for a community post

    You can set a status of Planned, Not planned, or Completed on any community post. This can be especially useful if you have feature requests in your community and want to communicate status.

    When you set status, the status appears in the list of posts within the topic and on the post itself. You can filter by any status to see all posts in a topic with the selected status.

    Post status examples

    To set status on a community post

    • In the post where you want to set status, click the Post actions icon (Actions icon), then select one of the statuses: Planned, Not planned, Completed, and Answered.

    To filter community posts by status

    • In a community topic, click Show all, then select one of the status options.

    Filter by status

    Closing a post for comments

    If you don’t want to allow comments on a community post, you can close the post for comments.

    To close a community post for comments

    • In the post you want to close for comments, click the Post actions icon (guide_post_actions_icon), then select Close for comments.

    Marking a comment as the official comment for a post

    You can mark a comment as the official comment for a community post. You can make either a new comment or an existing comment the official comment. Make sure that you mark only one comment as the official comment for a post. You cannot mark an official comment on a knowledge base article.

    When you mark an official comment, it appears as the first comment on the post and is indicated as the official comment. That means that if you edit an existing comment and mark it as official, that comment moves from its current place in the order and timeline of comments, and appears at the beginning, ahead of any older comments.

    Official comment

    If a comment is marked as the official comment and the user who made the comment is downgraded to end user, the comment remains the official comment.

    To mark a comment as the official comment

    1. In the post where you want an official comment, either enter a new comment or edit an existing comment.
    2. Click Official comment under the comment.

      Official comment checkbox

    3. Click Submit or Update, depending on whether you are making a new comment or editing an existing comment.

      The comment becomes the first comment on the post and is indicated as the official comment. The official comment checkbox is then hidden for all other comments related to the post.

    Marking a post as answered

    If a comment has been added that answers the subject of a post, you can mark the post as answered.

    To mark a post as answered

    • In the post you want to mark as answered, click the Post actions icon (Actions icon), then select Answered.

      If you have the correct moderator permissions, you can set the status as Answered only if a status has not previously been set.

      If you are a Guide Manager, you can change the status to Answered from any other state.

    Approving pending content

    If a post or comment is marked as pending approval, you can mark it as approved.

    To mark a post as approved

    • In the post you want to mark as approved, click the Post actions icon (Actions icon), then select Approve.

    Approve pending content

    This action is not available for content that is pending approval in the spam queue.

    Moving a live community post to the moderation queue

    You can send a live post to the content moderation queue if it contains content that you want to review. The post is then hidden from the community and appears in the content moderation queue for Guide Managers.

    To move a live post for moderation

    • In the post you want to moderate, click the Post actions icon (Actions icon), then select Hide for moderation.

    Hide for moderation

    The post is no longer visible to the community, however Guide Managers can see the post in the content moderation queue. From there, a Guide Manager can review the post and decide which action to take. See Moderating end-user content.

    Creating a ticket from a community post or comment

    You can create a ticket from a community post or comment. When you do, a ticket is created in your instance of Zendesk Support with the body text from the post or comment and a link to the post or comment.

    In the community post, the ticket number link appears at the top of the post so you can easily access the ticket from the post. In a community comment, the ticket number link appears beside the comment. If you click the link, you can access the ticket directly.

    Ticket number

    To create a ticket from a community post

    1. In the post you want to convert to a ticket, click the Post actions icon (Actions icon), then select Create a ticket.
    2. A Create a ticket window appears with the following fields pre-filled with information from the post:

      • Subject:

        Request created from: <community post title>

      • Description:

        This request was created from a contribution made by <post creator name> on <date and time>.

      There is a link to the post itself, followed by the post contents.

      • Who should be the requester of the ticket?:

        The default ticket requester is the person who created the post, but you can change this to be yourself. The person specified in this field receives an email notification when the support ticket is created.

      Create a ticket

      Make any changes to the subject or description as needed, then select yourself or the poster as the requester of the ticket.

      The person specified in this field receives an email notification.

    3. Click Create ticket.
    4. In Support, the ticket is created, and is triaged by your support team.

      Ticket in Support

    To create a ticket from a comment on a community post

    1. Beside the comment you want to convert to a ticket, click the Comment actions icon (Actions icon), then select Create a ticket.

      Post comment create ticket

    2. A Create a ticket window appears with the following fields prefilled with information from the comment:

      • Subject:

        Request created from: <community post title>

      • Description:

        This request was created from a contribution made by <comment creator name> on <date and time>.

      There is a link to the comment itself, followed by the comment contents.

      • Who should be the requester of the ticket?:

        The default ticket requester is the person who created the comment, but you can change this to be yourself. The person specified in this field receives an email notification when the support ticket is created.

        Create ticket comment

      Make any changes to the subject or description as needed, then select yourself or the poster as the requester of the ticket.

      The person specified in this field receives an email notification.

    3. Click Create ticket.
    4. In Support, the ticket is created, and is triaged by your support team.

      Ticket in Support

  • Allowing agents to edit and delete posts

    All signed-in users can add posts to community topics. Only Guide managers, and users with moderator rights, can edit and delete posts by default.

    A Guide manager can allow agents to edit or delete posts in select community topics. This permission is granted at the topic level and must be set topic by topic. You must be a Guide manager to grant this permission.

    For more information about overall permissions, see About roles and setting permissions.

    To enable agents to edit or delete articles in a topic

    1. Open the topic, then click Edit topic in the top menu bar.
    2. In the Who can manage posts option in the section’s sidebar, select Agents and managers.

      Write access

      Managing posts means that agents can edit or delete any post in that specific community topic.

    3. Click Update.
  • Customizing status icons for posts

    The community features are wonderful, especially the post actions. However, what happens when the default actions aren’t exactly what you are looking for? Currently there is no way to add or modify the actions that are available, but with Curlybars the existing actions can be re-purposed.

    Displaying new status icons

    For the purpose of this article, let’s say we want to change the actions from: Planned, Not Planned, Completed and Answered to In the Works, Under Construction, Implemented and Officially Answered. To make these modifications, the replacement text will need to be inserted in all of the affected pages. To learn more about how to use Curlybars to make these changes, see Enhanced Help Center theming framework.

    The image below displays what the original statuses look like:

    Original

    The image below displays what the new statuses will look like:

    Modified

    There are two steps to change all customer facing instances to the desired replacement name:

    1. Modifying ‘Show all’
    2. Changing status icons’ names

    Modifying ‘Show all’

    1. In the Help Center, Edit your theme code. For more information on how to edit a Help Center theme, see Customizing your Help Center theme.
    2. Select the community_topic_page.hbs as the template to edit.
    3. Locate the code for the filter labels inside the dropdowns:

      Code screenshot

    4. Modify the {{#each filters}} with the following ‘identifier’ information:

       {{#each filters}}
        <a href="{{url}}" aria-selected="{{selected}}" role="menuitem">
         {{#is identifier 'all'}}{{name}}{{else}}
         {{#is identifier 'not_planned'}}Gathering Feedback{{/is}}
         {{#is identifier 'planned'}}In the Works{{/is}}
         {{#is identifier 'answered'}}Officially Answered{{/is}}
         {{#is identifier 'completed'}}Implemented{{/is}}
         {{/is}}
        </a>
       {{/each}}
      
    5. Click Publish.

    Changing status icons’ names

    The next change you need to make is for the actual status icons on the Community topic page. Your updated status icons will resemble the image below.

    Screenshot

    1. Scroll down to the {{#is status 'none'}} expression lower on the Community topic page.
    2. Enter the following code to change your status icons:

       {{#is status 'none'}}
        {{else}}
         <span class="status-label-{{status_dasherized}} status-label striped-list-status">
         {{#is status 'not_planned'}}Gathering Feedback{{/is}}
         {{#is status 'planned'}}In the Works{{/is}}
         {{#is status 'answered'}}Officially Answered{{/is}}
         {{#is status 'completed'}}Implemented{{/is}}</span>
       {{/is}}
      
    3. Click Publish.
    4. Next, select the community_post_list_page.hbs template and locate the same {{#is status 'none'}} expression.
    5. Enter in the above code there as well.
    6. You have successfully modified your list pages and drop-downs. The only thing left to do is make sure the status indicator on the individual posts reflect the correct wording as shown in the screen shot below.

      Modifying

    7. Select the community_post_page.hbs template to modify individual posts.
    8. Enter the following code on the {{#if post.status}} expression:

       {{#is post.status 'none'}}
         {{else}}
         <span class="status-label-{{post.status_dasherized}} status-label">
         {{#is post.status 'not_planned'}}Gathering Feedback{{/is}}
         {{#is post.status 'planned'}}In the Works{{/is}}
         {{#is post.status 'answered'}}Officially Answered{{/is}}
         {{#is post.status 'completed'}}Implemented{{/is}}
         </span>
        {{/is}}
      

      Code update

    9. Click Publish.

    Using dynamic content to translate your statuses

    If your Help Center is available in multiple languages you can use dynamic content helpers to translate your new terms. For more information on dynamic content see, Dynamic content helpers and Providing multiple language support with dynamic content.

    You can create the dynamic content in Zendesk Support and then use the helpers below in place of the previous term.

    Code screenshot

    This will enable your status icons to translate for your many customers.

    Final result

    Now that all of your bases are covered, all end-user information should display your own words, and not the default options provided with the feature!

  • Viewing community moderator activity

    Guide managers can see all community activity in moderation activities.

    This is a view of all actions taken by community moderators, as well as any actions taken by the community itself. For example, you can see if posts have been approved or featured by community moderators, or if someone has moved or deleted their own post. If you haven’t set up any community moderators yet, see Creating community moderator groups.

    Moderation activities is a historical record of activity in the community. If you want to change any of the actions applied to a particular post or comment, you need to do that in the post or comment itself.

    To view moderation activities

    1. In Guide, click the Moderate content (Moderate content) icon in the sidebar.
    2. Click Moderation activities. The Moderation activities page appears.

      Moderation activities

      You can see all the actions that have occurred in the community, including information on the event, the relevant article or comment, who moderated the content, and the date of the activity. You can sort events by date.

      • Event: shows the actions taken for a post or comment.

        These actions might include Hide for moderation, Approve, Pin to top, Feature post, and Mark as answered. See Managing community posts for all actions you can take on a post or comment.

        If a post has been moved, hover over the post and you can see information about the original location and the new location of the post.

      • Content: shows the post or comment that has been actioned.

        Click the text in Content to go to the post or comment.

        If a moderator hides a post or comment, and then deletes it, there is not a link to the content because the content has been permanently removed from the community.

      • Moderated by: shows the avatar of the moderator.

        Hover over the image to see the name (or alias) and role of the moderator.

      • Date: shows the date of the action.

        You can sort the events in ascending or descending date order.

  • Analyzing community activity

    You can monitor activity data for your community using in the Reporting dashboard in Support. Statistics include the number of posts created, how many users have viewed posts, and the total number of votes, subscriptions, and comments.

    You must be a Guide Manager to view these statistics. To view knowledge base activity, see Analyzing knowledge base activity.

    You must enable your Help Center and community before you can view the Community dashboard (see Getting started with Gather).

    Viewing community activity for your Help Center

    You can view community analytics for your Help Center in the Reporting dashboard in Support.

    To view community data

    1. In Support, click the Reporting icon (Report icon) in the sidebar, then click the Community tab.

    The Posts dataset is open by default.

    Reporting dashboard

    1. If you have multiple brands, click the All brands drop-down menu, then select a brand if you want to see data for that brand only.

      All brands is selected by default, and includes the combined activity of the communities in all of your Help Centers.

    2. Click the Reporting period drop-down menu, then select an option if you want to change the reporting time frame.

      Select Custom to enter a specific start and end date.

    3. Click any of the five datasets at the top to drill down.

      Each dataset displays a graph of daily activity and a table, below the graph, of top posts for that dataset. Datasets include:

      • Posts is the total number of new posts created in the community during the reporting period.
      • Views is the total number of views for posts in the community during the reporting period, including internal agent views.
      • Net Votes is the difference of all the positive and negative votes on all posts in the community during the reporting period.
      • Subscriptions is the total number of user subscriptions for topics and posts in the community during the reporting period.
      • Comments is the total number of comments on posts in the community during the reporting period.
    4. Hover your mouse over a node to see the total number for that day.

      Hover mouse

    Following up on community data

    Community statistics give you insight into which questions customers are most interested in. You can then take action based on this information.

    For example, you can track the posts that are most and least popular, or have the most comments, to understand more about the subject. You can then review the post to see if there is some follow up action required, for example, whether this area requires a knowledge base article to explain the subject in more detail, or a ticket needs to be raised to request a new feature.

Using the Knowledge Capture app

  • Creating articles with the app

    On Guide Professional and Enterprise, agents can use the Knowledge Capture app in the Support agent interface to create new articles using pre-defined templates. If a template does not exist, agents will not be able to create articles using the Knowledge Capture app.

    The agent can copy and paste content from the ticket, or write new content based on the ticket, to create the article. The Knowledge Capture app does not pre-populate the new article with content from the ticket.

    For information about planning your workflow, see Setting up your workflow for created articles.

    If you do not want agents to create articles using the Knowledge Capture app, you can disable that option.

    To create an article

    1. In a new or existing ticket, open the Knowledge Capture app.

      You must open the ticket directly. You cannot use the Knowledge Capture app when you select a ticket in a view and click the Edit ticket(s) button.

    2. Click the Create Knowledge button in the Knowledge Capture app.

      Create button

    3. If you have multiple brands, click the drop-down menu to select a Help Center.

    4. Select a template from the list.

      Agents can see and select only the templates where they have management permissions for editing.

      If you have not created any templates, you need to set up a template first (see Creating templates for the Knowledge Capture app).

      Choose template

    5. Add a title and content to the article, according to the headings in the template.

    6. Change the article’s section, if necessary, depending on your workflow for new knowledge.

    7. Make any other changes you need in the article’s sidebar.

      The author is automatically updated to be the agent creating the article.

    8. Click Save or choose another option from the drop-down.

      The article created is a duplicate of the template; it does not overwrite the template. The new article does not retain the KCTemplate label.

  • Installing the app

    The Knowledge Capture app is installed by default with any Guide plan and Support Team, Professional, or Enterprise.

    The app enables agents to:

    • Search the Help Center without leaving the ticket
    • Insert links to relevant Help Center articles in ticket comments
    • (Guide Professional and Enterprise) Add inline feedback to existing articles that need updates
    • (Guide Professional and Enterprise) Create new articles while answering tickets, using a pre-defined template

    The Knowledge Capture app is available in the Zendesk Marketplace if it does not appear in your Support agent interface (see Opening the Knowledge Capture app) or you need to install it again for some reason.

    You cannot install the Knowledge Capture app on Support Essential.

    To install the Knowledge Capture app

    1. In Zendesk Support, select Admin > Apps > Marketplace, then find the Knowledge Capture app and click the icon..

      App logo

    2. Click Install.

    3. On the Installation page, enter a new Title, if you’d like.

    4. Select or deselect any of the app settings, as needed:

      • (Guide Professional and Enterprise only) Allow agents to create new articles enables agents to use the app to create new articles using a pre-defined template (see Creating articles with the app).
      • (Guide Professional and Enterprise only) Allow agents to flag articles enables agents to use the app to identify existing articles that need updates and add inline comments (see Flagging articles with the app).
      • Show in ticket editor shows the app in the ticket editor. You can choose to display the app in both the editor and the apps panel.

      For tickets from social channels or markdown tickets where the rich text editor is not available, the app will be available in the sidebar app location.

      • Show in the Apps panel shows the app in the apps panel in the ticket sidebar.
      • Auto-select brand for search enables the app to search the Help Center of the brand set on the ticket. When deselected, the app searches the Help Center based on the agent’s last selected brand in the Knowledge Capture app.
    5. Click Enable role restrictions if you’d like to limit app access to specific roles, then select a role.

      You can select multiple roles.

      Settings roles

    6. Click Enable group restrictions if you’d like to limit app access to specific groups, then select a group.

      You can select multiple groups.

    7. Click Install.

      The Knowledge Capture app is added. To start using the app, see Opening the Knowledge Capture app.

  • Creating templates for the app

    Agents can use the Knowledge Capture app to create new articles for Help Center, directly from the Support ticket interface. To do so, you need to create one or more templates for your agents to use to create their new content.

    Any article in your Help Center that contains the label KCTemplate is available as a template in the Knowledge Capture app. You can create as many templates as you need. If you have multiple brands, you must create a template in each Help Center.

    Here’s how it works when an agent uses the app to create new content based on a template:

    • Any new article created using a template is a duplicate of the template and does not overwrite the template article.
    • All of the template’s fields are duplicated for the new article, with two exceptions: the KCTemplate label is removed and the author is set to the user creating the new article.
    • All of the template’s content is duplicated for the new article except for images or attachments, which are not included in any new article.
    • The section where the template is published is retained for the new article. Agents can manually change the section, if they want, to any section where they have permission to publish.

    You must install the Knowledge Capture app (see Installing the app) and have Guide Professional to create templates and articles using the app.

    To create a template for the Knowledge Capture app

    1. Click Articles in the top menu bar, then select Add article.

      Alternatively, you can open an existing article that you want to make a template.

      Add options

    2. Enter a Title for your template.

      Think about the types of templates you plan to create and consider including the type in the title. For example, you might want to create a Q&A template and a How To template, and include that in the template title.

    3. Enter the headings and content for your template in the body.

      You might want to include headings specific to the type of template you are creating. For example, a Problem/Solution template might include sections for the problem, the conditions, and the steps for the solution.

      Check out this discussion for template ideas: Do you use a template to author your knowledge base content.

      Do not include images or attachments, as they will not be included in any new article created based on this template.

    4. Set the Managed by and Visible to permissions.

      Agents will only be able to use templates where they have management permissions for editing.

    5. In Publish in section select a section for the template.

      You might want to create a restricted Help Center section for agents to publish new content, depending on your workflow. Alternatively, you might want agents to create new content as a draft or work in progress.

      New articles based on this template will be created in the section you specify, unless an agent manually changes the section. Agents can create new articles in any section where they have permission (see Allowing agents to add, edit, and delete articles). The template does not restrict agents to publishing in a specific section.

    6. Leave the Author as is.

      When an agent creates an article based on this template, the current agent will be set as the author automatically.

    7. Add KCTemplate in Label.

      The label will not persist on any new articles created based on the template.

      You must add this label for your article to be treated as a template in the Knowledge Capture app.

    8. Click Save.

      Now your template will be available to agents using the Knowledge Capture app to create new articles. For information, see Creating articles with the Knowledge Capture app.

  • Searching and linking articles using the app

    Agents can use the Knowledge Capture app in the Support agent interface to search for Help Center articles and preview them, without leaving the ticket. They can also add a link to the article directly in the ticket.

    Searching for and previewing articles

    You can use the Knowledge Capture app to search the Help Center for articles relevant to the issues raised in the ticket. The Knowledge Capture app search uses the same search technology as the Help Center search.

    The app searches content in the end-user’s selected language, if it’s available in your Help Center. Otherwise the app searches the default language of your Help Center. You can change the language in the app to search another language in your Help Center.

    If you have multiple brands, the app searches the Help Center associated with the brand of the ticket. You can change the brand to search Help Center content for another brand.

    To search for Help Center articles

    1. In a new or existing ticket, open the Knowledge Capture app.

    2. Enter a topic or keyword in the Knowledge Capture app search box.

      On Lite, the search results are pre-populated based on a search of the ticket subject. On Professional and Enterprise, the search results are pre-populated with Answer Bot-powered article suggestions, based on the requester’s most recent comment.

    3. Press Return or click the Search icon.

      The search returns public and internal articles. The search does not return other content, such as drafts or community posts. Internal articles indicate that they are locked and not available to the requester.

    4. To open a preview of the article in a preview window, click an article card.

      If you’re using the app in the ticket editor location, you can hover over an article card to see a preview in the app. There is not a hover preview if you’re using the app in the Apps panel sidebar location.

      Search preview

    5. If you support multiple brands and languages, click the brand or language or brand drop-down to change the selection for your search.

      By default, if you support multiple languages, the app searches content in the end-user’s selected language, if available; otherwise the app searches the default language of your Help Center. By default, if you support multiple brands, the app searches content the Help Center associated with the brand of the ticket you are viewing. You can change the language and the brand in the app.

      Brand dropdown

    When you find an article you think is useful in the app search, you can add a link to it in the ticket. You can add link to multiple articles in a comment.

    Any link in a ticket comment is recorded by the Knowledge Capture app, regardless of whether it was added manually or using the app. If you want to add a link to an internal article that the requester does not have permission to view, you can add it in an internal comment and it will be recorded as Knowledge Capture.

    If you are on Guide Professional or Enterprise, links to articles in tickets are recorded as events in the Knowledge Capture dashboard (see Analyzing your Knowledge Capture activity).

    To add a link to an article

    1. In a new or existing ticket, open the Knowledge Capture app.

      You must open the ticket directly. You cannot use the Knowledge Capture app when you select a ticket in a view and click the Edit ticket(s) button.

    2. Review the pre-populated results or enter your own search and review the results.

      On Lite, the search results are pre-populated based on a search of the ticket subject. On Professional and Enterprise, the search results are pre-populated with Answer Bot-powered article suggestions, based on the requester’s most recent comment.

    3. If you support multiple languages or brands, click the language or brand drop-down in the app to change the language or the brand for your search.

    4. To insert a link to an article, do one of the following:

      • Click Link article in the article card.

      Link article

      • Click Link article in the article preview modal.

      Link article in modal

      • (Editor app location only) Click Expand article in the article preview, then select Link article.

      Expand article

      When you link to an article, the hyperlink is inserted in the comment where your cursor is. The link is host mapped, if you have host mapping.

      If you have WYSIWYG enabled, the link text inserted is the article title, linked to the article in Help Center. If you have Markdown enabled, the markdown {{Article title}}: {{URL}} is inserted.

    5. To remove the link or to modify link text in the comment, click the link in the comment, then click the Delete icon or the Edit icon.

      You can only do this before the comment is submitted. You cannot remove a linked article after the comment has been submitted.

      Link edit

    6. Add any other text you’d like to the comment, then submit the ticket as you normally would.

      On Professional and Enterprise, the ticket requester has the option to self-solve the ticket if the linked article solves their issue, unless that setting has been disabled.

      A comment is added to the ticket if the requester solves the ticket. It will either be a comment from Answer Bot or Rapid Resolve, depending on whether the linked article was an Answer Bot suggestion or an article you manually found and inserted.

    About the user experience with Answer Bot

    On Guide Professional and Enterprise, when agents use the Knowledge Capture app to search and link to articles, Answer Bot automatically suggests articles, based on a number of criteria including the ticket subject and requester’s most recent comment. This functionality is built-in, and does not require an Answer Bot subscription.

    Answer Bot suggested articles in the Knowledge Capture app are indicated by the Answer Bot logo and name on the article.

    Bot agents

    Answer Bot only works in certain languages (see Answer Bot supported languages).

    By default, when an agent uses the Knowledge Capture app to link to an article, either an article suggested by Answer Bot or an article the agent manually finds and links to, the ticket requester has the option to solve the ticket after viewing the linked article.

    When the user opens the linked article, they can click “Yes, close my request” if the article resolves their issue, and the ticket is solved. The user can click “No” if the article does not resolve their issue, and the ticket status is unchanged.

    Self solve message

    Back in the ticket the agent can see that the user self-solved the ticket.

    • If the article was suggested by Answer Bot, the ticket comment is from Answer Bot.

      Solved comment

    • If the article was manually found and linked to by the agent, the ticket comment is from Rapid Resolve.

      Rapid resolve

  • Flagging articles with the app

    On Guide Professional and Enterprise, agents can use the Knowledge Capture app in the Support agent interface to add feedback to flag existing articles. If a ticket reveals missing or incorrect information in an article, an agent can add a comment near the relevant text describing the needed change to flag the article for an update.

    When an agent submits feedback for an article, a ticket is created. The ticket includes:

    • A link to the article that needs the update
    • A link to the ticket that is the source of the update
    • The user name of the agent who flagged the ticket
    • The inline comments added by the agent

    For information about planning your workflow, see Setting up your workflow for flagged articles. If you do not want agents to flag articles using the Knowledge Capture app, you can disable that option.

    To flag an article

    1. In a new or existing ticket, open the Knowledge Capture app.

      You must open the ticket directly. You cannot use the Knowledge Capture app when you select a ticket in a view and click the Edit ticket(s) button.

    2. Click an article title in the search results in the app to open the article in a preview window.

      You might need to search first if you don’t see the article you want to flag.

    3. Hover over the text that needs an update, then click the comment icon that appears beside the text.

      Comment

      A comment field appears.

    4. Enter your feedback in the comment field.

      If you need to remove your comment, click the X beside the comment field.

    5. Add comments to other sections, as needed.

    6. Click Send feedback.

      You will not see the feedback button until you have entered at least one comment.

    When you submit feedback, a new ticket is created. The link to the ticket appears at the top of the feedback window.

    Flagged article

    The resulting flagged ticket has the tag knowledge_capture_flagged_article. You can use the tag to create views, macros, and business rules.

    The resulting flagged ticket contains a link to the original ticket where it was flagged, if the article was flagged from an existing ticket. If the article was flagged from a new ticket, that had not been submitted yet, the resulting flagged ticket will not have a link to the original ticket because the new ticket did not have a ticket number at the time.

  • Opening the Knowledge Capture app

    Agents can open the Knowledge Capture app in the Support agent interface to perform the following actions:

    • Search the Help Center without leaving the ticket
    • Insert links to relevant Help Center articles in ticket comments
    • (Guide Professional and Enterprise) Add inline feedback to existing articles that need updates
    • (Guide Professional and Enterprise) Create new articles while answering tickets, using a pre-defined template

    The Knowledge Capture app appears in the editor toolbar in tickets by default with any Guide plan and Support Team, Professional, or Enterprise. It might appear in the editor toolbar in tickets, in the Apps panel in the sidebar, or in both locations, depending on how it’s set up.

    If the you do not see the see the Knowledge Capture in any of those locations, you might need to have an admin manually install the app (see Installing the Knowledge Capture app). You cannot install the Knowledge Capture app on Support Essential.

    Opening the Knowledge Capture app from the editor toolbar

    Agents can open the Knowledge Capture app from the editor toolbar in tickets, if it appears there. The Knowledge Capture app appears in the editor toolbar in tickets by default.

    To open the Knowledge Capture app from the editor toolbar

    1. Open a new or existing ticket.

      You should not open the ticket by selecting it in a view, then clicking the Edit ticket(s) button. The Knowledge Capture app is not available in that case.

    2. Click the Knowledge Capture icon in the editor toolbar under the ticket comment.

      Editor location

      The Knowledge Capture app opens. The Knowledge Capture app will not load if you have not activated your Help Center.

    You can use the Knowledge Capture app to take the following actions:

    • Add links to articles in tickets
    • Add feedback to flag existing articles (Professional and Enterprise)
    • Create new articles based on tickets (Professional and Enterprise)

    Opening the Knowledge Capture app from the Apps panel in the sidebar

    Agents can open the Knowledge Capture app from the App panel in the sidebar, if it appears there. An administrator must enable the app in the sidebar location. It does not appear there by default.

    To open the Knowledge Capture app from the Apps panel

    1. Open a new or existing ticket.

      You should not open the ticket by selecting it in a view, then clicking the Edit ticket(s) button. The Knowledge Capture app is not available in that case.

    2. Click the Apps button to open the Apps panel, if it’s not already open.

    3. Locate the Knowledge Capture app.

      App UI

      The Knowledge Capture app will not load if you have not activated your Help Center.

    You can use the Knowledge Capture app to take the following actions:

    • Search existing articles
    • Add links to articles in tickets
    • Add feedback to flag existing articles (Professional and Enterprise)
    • Create new articles based on tickets (Professional and Enterprise)

Setting up Answer Bot

  • Understanding how Answer Bot works

    How does Answer Bot process natural language?

    Answer Bot is powered by Artificial Intelligence which means that it is able to mimic human behavior. Answer Bot uses natural language processing (NLP) to read every article in your help center and to understand the main concept behind each article. Answer Bot then takes all the concepts from all the articles and places them onto a map. Each concept gets its very own “address” on the map so that it lives near other, similar concepts. However, instead of just city, street, and zip code, this address has 500 parts. Whenever a new question comes in, Answer Bot does its best to understand the concept that the question is asking about and use the map to determine the closest existing article.

    For example, here are some concepts that Answer Bot might extract from a few questions:

    Question Possible concept
    How do I dump my tickets to a file? Exporting Data
    I’m locked out of my account Account Access / Password Reset
    How do I create a crane? Folding Origami Birds

    How does Answer Bot decide which articles to recommend?

    When an incoming question closely matches with an existing article, they become “neighbors” on the map (as described above) and it’s clear that Answer Bot should recommend the article. However, when the closest match is a few streets over, or in a nearby neighborhood, it becomes less certain that the concepts are related.

    The data science team at Zendesk carefully monitors Answer Bot’s performance and has finely tuned this over time by adjusting a “threshold knob”. This threshold is not adjustable by admin or agents, it’s only accessible to the Zendesk development teams. The threshold knob is a global control, meaning it affects all Answer Bot accounts, and is used to determine how closely two concepts must be on the concept map to be considered similar concepts. If the threshold knob is turned up, Answer Bot becomes more conservative and will recommend fewer articles that are more likely to be relevant to the question. However, this means there will also be more questions where Answer Bot does not make any recommendations at all. If the threshold knob is turned down, Answer Bot will recommend more articles, but there’s a higher chance that some of the articles will appear irrelevant to the end user.

    Common misconceptions: What Answer Bot doesn’t do

    There are some common misconceptions about Answer Bot, and machine learning in general, that can lead to confusion over how they work. In this section, we’ll address these misconceptions and hopefully give you a clearer understanding about what Answer Bot does – and doesn’t do – with your data.

    Does Answer Bot learn based on end user feedback? Isn’t that where the machine learning comes in?

    Although Answer Bot is powered by a machine learning model, this does not mean that Answer Bot is constantly learning. Answer Bot’s model does not incorporate feedback in real-time from end users or agents. Therefore, the feedback has no influence on which articles Answer Bot will recommend.

    The end user feedback is captured and used in a number of ways:

    • It is displayed to agents to provide additional context on what articles were viewed, marked as “not helpful,” or used to resolve a case
    • It is exposed in reporting for admin to track Answer Bot’s performance
    • It is evaluated by the data science team at Zendesk

    If you see that Answer Bot is repeatedly recommending incorrect articles, the best thing to do is modify the title and the first 75 words of the articles to make the main concept more clear.

    You can also create a “whitelist” of articles for Answer Bot by using labels so that Answer Bot’s suggestions will only draw from a sub-set of articles.

    Overall, we’ve found that Answer Bot’s AI-powered recommendations are more accurate and relevant than a keyword search, especially when the question is asked as a full sentence (instead of one to three words).

    However, there are times when a keyword search may work better. For example, when a user asks a single-word question via Web Widget, Answer Bot defaults to using a keyword search, as this is generally more accurate for single-word queries. The exception to this is languages, like Chinese, that do not have explicit word boundaries like spaces.

    Can I “train” Answer Bot by asking the same question and answer over and over again, and responding with “Yes” or “No” to mark an article as relevant or irrelevant?

    No. Answer Bot will consistently recommend the same articles regardless of any feedback from agents or end users. Answer Bot is specifically built so it doesn’t require any training to get started. It’s already pre-trained to understand natural language. If you test out a phrase/question and Answer Bot is making incorrect recommendations, the best thing to do is modify the title and the first 75 words of the articles to make the main concept more clear.

    If I add labels to my articles, is that like adding a keyword to the article? Can this be done to boost how often an article is suggested?

    Labels are a great way to create a “whitelist” of approved articles that Answer Bot can pull from. However, labels do not have an influence on the weighting that Answer Bot gives to each article.

    If I can’t train Answer Bot, how can I improve Answer Bot’s performance?

    The best way to improve Answer Bot’s performance is to consider the following:

    • Analyze your Answer Bot Activity - Use Explore to see which articles are you best and worst-performing.
    • The Structure of Existing Articles - Look at your help center articles and make sure that the content is concise and well organized. Each title should be phrased as a short sentence or a question.
    • Content Cues - Use machine learning technology and Guide article usage data to help you discover opportunities and tasks that will improve the health of your knowledge base.
  • Understanding where you can use Answer Bot

    Answer Bot functionality is available in a number of Zendesk products and integrations. This article is a guide to all the ways you can use Answer Bot, and where to find more information on adding it to your toolbox.

    Answer Bot in the Knowledge Capture app and Slack integration is included free of charge. An add-on subscription is required to use Answer Bot with the other features discussed in this article.

    Answer Bot in Support emails

    The most basic Answer Bot functionality is the automated email response. When an end user submits a support request via email, they receive an auto-response acknowledging their request. When Answer Bot is enabled, that email includes a list of articles from your Help Center that can help the requester solve their own issue:

    Answer Bot email

    If a suggested article answers their question, the end user can close their support request; if no article addresses the problem, the support request remains in the ticket queue to be answered by an agent.

    Answer Bot in web forms

    You can add Answer Bot to your web-based ticket forms as well. When enabled, if an end user submits a support request through your Help Center’s submission form, a pop-up modal offers them suggestions for articles that they may find useful:

    Answer Bot webform

    As with the emailed suggestions, if any article in the modal answers the end user’s question, they can close the support request with no input from an agent; if it doesn’t, their request remains in the ticket queue.

    Answer Bot in the Knowledge Capture app

    If you’re on Guide Professional or Enterprise, and using the Knowledge Capture app, by default you have some internal Answer Bot functionality, without needing a separate Answer Bot subscription.

    There are two features in the Knowledge Capture app that give your agents more access to Answer Bot functionality:

    • Answer bot for agents. When a requester adds a comment to a ticket, Answer Bot looks for relevant articles, and suggests them within the app, allowing agents to view them. Agents can then decide to insert them into their response to the requester, or use the linked articles to help them craft their reply.
    • Rapid Resolve. When an agent sends a link to an end user directly from the Knowledge Capture app (using Answer Bot for agents), end users can then self-solve their tickets directly from the article they’re viewing.

    You can disable the self-solving option in the Knowledge Capture app, if needed. This prevents end users from closing their own requests based on articles offered by an agent, or by Answer Bot.

    Answer Bot for Slack

    The Answer Bot for Slack is a free feature enabled in the Slack for Zendesk Support integration if you are on the Guide Enterprise or Professional plan.

    This feature allows Answer Bot to “listen in” on questions posed in any Slack channel configured to use the Support integration, and offer relevant article suggestions:

    Answer Bot Slack

    Users can indicate whether the offered article is useful to them by clicking the Yes or No buttons and, if more than one article is found, they can click the More suggestions button to view additional articles.

    If their question is not answered by any of the articles offered, they can submit a Support ticket:

    Answer Bot Slack response

    Answer Bot in the Web Widget

    If you have the Web Widget installed on your Help Center or web site, your customers can engage with Answer Bot whenever they need help across your site, in a conversational way.

    Answer Bot Web Widget

    Escalation options to a human agent can always be made available, such as requesting a callback, live chat or leaving a message.

    Answer Bot in the SDK

    Answer Bot can be a part of your mobile support offering. Our mobile SDKs make it easy to integrate into any mobile app, answering customer questions in-context without them ever having to leave the app or disrupt their experience. Users can mark the articles as “solving” their issues, or indicate they still need help - and escalate their issue to a Support ticket.

    Answer Bot APIs

    The Answer Bot API enables businesses to extend AI-powered self-service help to any channel. Developers can build their own own self-service automation experiences wherever they’d like. When implemented correctly users can quickly and easily mark their questions as resolved / not-resolved giving you more data for reporting, and improving the Answer Bot model over time.

  • Using Answer Bot with web forms

    When a user submits a support request through a web form on your Help Center, Answer Bot can immediately suggest links to potentially relevant knowledge base articles.

    Understanding the end user experience

    With Answer Bot enabled on your web forms, the end user receives a list of suggested articles when they make a help request through your Help Center. As soon as they submit their request, an automated pop-up window appears on screen:

    After submit request

    From this window, the end user can click any of the article titles, or the View full article button, to open the article in a new tab.

    View full article

    While viewing the full article, a modal appears allowing them to perform a number of related actions, including:

    • Clicking the request number to view to their help request in a new tab.
    • Clicking Yes, close my request to close the help request. If the end user clicks this button, they should not expect to receive any more communication about the request.
    • Clicking No to open an optional feedback window, asking for more information about why the article didn’t help. If the end user clicks this button, the ticket will be handled as usual.

    Enabling and configuring Answer Bot for web forms

    Just as email allows you to continue to manage the triggers that Answer Bot uses to respond with the suggested articles via email, web forms allow you to select and configure each web form experience which will then render the Answer Bot pop up modal on all Help Centers and Brands within your account.

    To enable web form functionality in Answer Bot

    1. Click the Admin icon (Manage icon) in the sidebar, then select Business Rules > Answer Bot.

    2. Click the Web form tab.

    3. Toggle on Web form channel enabled.

      Webform toggle

      This displays an expandable list of your brands and their related webforms.

    4. Use the toggles to determine which brands, and web forms, will use Answer Bot.

      Webform brands

    Testing Answer Bot results

    You can use labels (as with email and triggers) to segment and refine the overall articles that Answer Bot uses when searching for the correct articles, for each brand and form. Read about the best practice for using labels with Answer Bot.

    To configure and test Answer Bot labels

    1. After enabling Answer Bot for a web form, hover over the form name to display the Configure and test link.

    2. Click Configure and test to open the testing modal.

    3. Enter sample subject and description text to view the possible Answer Bot results for those terms.

  • Using labels in Answer Bot triggers

    You can use labels to help with targeting for your Answer Bot triggers. Adding labels to your Answer Bot triggers is optional. Labels enable you to specify a limited subset of articles that you want to search within.

    Labels

    Without labels, Answer Bot searches all article titles and content to identify suggested articles. By adding labels in triggers, you can restrict the search to articles containing those labels.

    This article covers three scenarios for using labels in triggers to better target articles with your Answer Bot triggers.

    Scenario 1: Targeting customer segments

    The most common scenario for when to use labels in triggers is when you have different customer segments and you want to show each segment only the relevant articles. For example, suppose you are a mobile game developer and you support both Android and iOS platforms. When you get a request from a customer who’s using Android, you want to show only Android articles.

    To accomplish this, create an “Android” Answer Bot trigger with the condition based on your custom field “Platform = Android.” Then, configure Answer Bot using labels to include only articles that contain the “android” label.

    Likewise, set up an additional trigger for the iOS platform and label.

    Scenario 2: Reducing the “noise” in your Help Center

    Your Help Center might contain a lot of articles, most of which you never want to be used as Answer Bot recommended articles.

    In this case, review your articles and add a use_for_answer_bot label to ~200-300 of the best articles. This will allow Answer Bot to focus and only suggest articles that make sense.

    Scenario 3: Conducting a limited trial for a specific type of inquiry

    While not recommended (it’s a slippery slope), some customers have proven the value of Answer Bot by focussing it on a specific type of inquiry, such as “password reset” requests.

    By creating an Answer Bot trigger that looks for specific words in the subject / description, and then using labels to restrict the articles suggested, you can limit the pilot and get some quantitative data to help support a broader rollout.

  • Setting up Answer Bot triggers, views and workflows

    Figuring out the best way to set up Answer Bot triggers, automations, views, and tags can be confusing for a lot of users.

    Basic tagging

    Basic tagging is important for almost all configurations and best practices for Answer Bot. To allow us to optimise how triggers are fired, set up new triggers to take new actions, or change automations, we have to start with some basic tag manipulation:

    1. Click the Admin icon (Manage icon) in the sidebar, then select Business Rules > Answer Bot.
    2. For every trigger listed in the Answer Bot trigger section, select Edit.
    3. Scroll down to the bottom of the trigger, to the Actions section and select Add Action.
    4. Select Add tags from the drop-down list and then insert the tag answer_bot_fired.
    5. Save the trigger.

    Now all tickets Answer Bot has fired on will have the answer_bot_fired tag and we can easily create a view to see them:

    1. Click the Admin icon (Manage icon) in the sidebar, then select Manage > Views.
    2. Create a new view - call it Answer Bot Tickets
    3. Set the conditions:
      • Ticket Status | Less than | Closed
      • Ticket Tags | Contains at least one of the following | answer_bot_fired

    Tagging solved tickets

    In this step, you’ll create a trigger that determines whether an end user has resolved their ticket based on an Answer Bot suggestion, and tags the ticket as solved by Answer Bot.

    1. Click the Admin icon (Manage icon) in the sidebar, then select Business Rules > Triggers.
    2. Create a new trigger - call it Answer Bot: Tag as solved
    3. Set the following Conditions:
      • Ticket | Is | Updated
      • Requester Role | Is | (end user)
      • Current user | Is | (end user)
      • Ticket Status | Changed to | Solved
      • Ticket Channel | Is | Email
      • Ticket Tags | Contains at least one of the following | answer_bot_fired
    4. Add the following Actions:
      • Select Add tags from the drop-down list and then insert the tag answer_bot_solved.
    5. Save the trigger.

    Now all tickets Answer Bot has solved will also have the answer_bot_solved tag, and we can easily create a view to see those as well:

    1. Click the Admin icon (Manage icon) in the sidebar, then select Manage > Views.
    2. Create a new view - call it Answer Bot Solved Tickets
    3. Set the conditions:
      • Ticket Status | Greater than | On-hold (or Pending, if on-hold status is not available for your account)
      • Ticket Tags | Contains at least one of the following | answer_bot_solved

    You should examine your ticketing workflows and make adjustments to the suggested trigger configuration to take into account non-standard ticketing workflows. For instance, if you have agents self-assigning and solving tickets without adding a public comment, the tag answer_bot_solved would be added, even though the ticket was not solved by Answer Bot. Adjusting the workflow, or adding conditions to the trigger to specify a ticket assignee, for example, can help avoid these conflicts.

    Removing tags from reopened Answer Bot tickets

    You could even take this one step further and add another trigger to remove the answer_bot_solved tag, if a ticket is reopened:

    1. Click the Admin icon (Manage icon) in the sidebar, then select Business Rules > Triggers.
    2. Create a new trigger - call it Answer Bot: Tag as Reopened
    3. Set the conditions:
      • Agent replies greater than 0
      • Ticket tags: contain answer_bot_solved
    4. Add the following Actions:
      • Select Add tags from the drop-down list and then insert the tag answer_bot_reopen.
      • Select Remove tags from the drop-down list and then insert the tag answer_bot_solved - this will remove that tag
    5. Save the trigger.

    Following up when customers self-solve

    Extending on the previous steps, you can also add another action to send the requester a follow-up email to confirm that their request has been marked as solved.

    1. Click the Admin icon (manage_icon) in the sidebar, then select Business Rules > Triggers.
    2. Create the trigger in the previous step, or edit the Answer Bot: Tag as solved trigger
    3. Add a new action:
      • Email > Requester
      • Enter an email subject and body
    4. Save the trigger.

    The final trigger should look like this:

    Tag as solved

    Creating an Answer Bot trigger for follow-up tickets

    In some situations, you may want to check in on a closed ticket. Closed tickets cannot be reopened, so to continue the conversation (rather than starting a new one) you need to create a follow-up ticket.

    When you create a follow-up ticket, all of the closed ticket’s information, including tags, is carried over into the new ticket. That means that the answer_bot_solved tag is applied to the follow-up ticket, which prevents Answer Bot from firing on the new ticket. This is fine if you do not need Answer Bot to work on the new ticket; however, if you want to include Answer Bot suggestions in the ticket notifications, you’ll need to remove the answer_bot_solved tag.

    To create a trigger removing the answer_bot_solved tag from a follow-up ticket

    1. Click the Admin icon (Manage icon) in the sidebar, then select Business Rules > Triggers.
    2. Create a new trigger - call it Answer Bot: Follow_up
    3. Set the conditions:
      • Ticket is: Created
      • Channel is: Closed ticket
      • Ticket tags: contain answer_bot_solved
    4. Add the following Actions:
      • Remove tags: answer_bot_solved
    5. Save the trigger.

    Suppressing Customer Satisfaction surveys on Answer Bot tickets

    Customer Satisfaction surveys were designed primarily for when human agents have been involved in solving the ticket. Many customers choose to disable satisfaction surveys for Answer Bot tickets. This step assumes that you have tagged tickets solved by Answer Bot with the answer_bot_solved tag.

    1. Click the Admin icon (Manage icon) in the sidebar, then select Business Rules > Automations.
    2. Open the automation that’s been set up to send Satisfaction surveys, by default it’s called Request customer satisfaction rating (System Automation).
    3. Add a new condition:
      • Ticket tags: contains none of the following: answer_bot_solved
    4. Save the automation.
  • Analyzing your Answer Bot activity

    Zendesk Explore features a pre-built dashboard to help you monitor your Answer Bot activity and article effectiveness. The dashboard can help you identify if Answer Bot is solving your support requests, how quickly users are opening suggested articles, and how your individual articles are performing.

    You can edit and customize the Answer Bot dashboard by cloning it (see Duplicating pre-built dashboards). If you need something more complex, you can write your own reports using a wide range of metrics and attributes. For details, see Getting started creating queries.

    The information on the dashboard updates on the following schedule:

    • Explore Lite: Each day at midnight in the timezone of the account.
    • Explore Professional: Once every hour. The update time is randomized within the hour.

    Accessing the Answer Bot dashboard

    Use the following procedure to access the Answer Bot dashboard.

    To access the Answer Bot dashboard

    1. In the Zendesk product tray, click the Explore icon (Explore icon).

    2. From the list of dashboards, select the Zendesk Guide dashboard.

    3. In the Guide dashboard, click the Answer Bot tab.

    Knowledge Capture and Answer Bot are the Guide components that Explore currently reports. If they are not configured then the Guide dashboard won’t be displayed.

    Understanding the Answer Bot dashboard reports

    The Answer Bot dashboard shows information about Answer Bot activities, ticket resolutions, and activity by articles. You can filter the reports on the dashboard by Time, Answer channel, Answer brand, Article language, Ticket group, and Ticket form.

    Answer Bot dashboard headline metrics

    The dashboard displays the following headline metrics (KPIs):

    • Suggestion rate: Displays the percentage of customer enquiries where Answer Bot offered a suggestion. The KPI also displays the number of answers, unsuccessful attempts, and attempts that Answer Bot made. Click the Improve link to get tips about how to improve the suggestion rate.
    • Click-through rate: Displays the percentage of responses clicked by end users from the total responses offered by Answer Bot. The KPI also displays the number of clicks, clicked articles, and the median click time. Click the Improve link to get tips about how to improve the click-through rate.
    • Resolution rate: Displays the percentage of enquiries that are resolved with no agent involvement. The KPI also displays the number of resolutions, indirect resolution answers, and the median resolution time. Click the Improve link to get tips about how to improve the resolution rate.
    • Rejection rate: Displays the percentage of suggested article marked as unhelpful by end users from the total number of suggestion offered by Answer Bot. The KPI also displays the number of articles marked unhelpful. Click the Decrease link to get tips about how to improve the rejection rate.

    Dashboard

    Answer Bot dashboard reports

    The dashboard displays the following reports:

    • Answer Bot activity volumes by date: Shows the number of offered, clicked, and resolved bot answers and resolutions over the chosen time period.

    Volumes by date

    • Answer Bot activity rates by date: The percentage of Answer Bot answers clicked, rejected, or resolved over the selected time period.

    Rates by date

    • Resolutions by month (12 month): The number of resolutions and the percentage resolution rate over a 12 month period.

    Resoltuions by month

    • The following reports can be filtered by Suggested article language, Answer brand, or Answer channel:

    Answers by attribute

    • Answers by selected attribute (top 10): Displays the top ten offered answers by language, brand, or channel.

    Top 10 answers

    • Clicks and resolutions by selected attribute (top 10): Displays the top ten clicks and resolutions by language, brand, or channel.

    Clicks and resolutions

    • Resolutions by selected attribute (12 months): Displays the resolutions over the last 12 months sorted by language, brand, or channel.

    Resolutions by attribute

    • Answer Bot activity by article: A detailed report about Answer Bot activity for all of your Guide articles. You can restrict the range of results shown by using the Top and Bottom filters.

    Activity by article